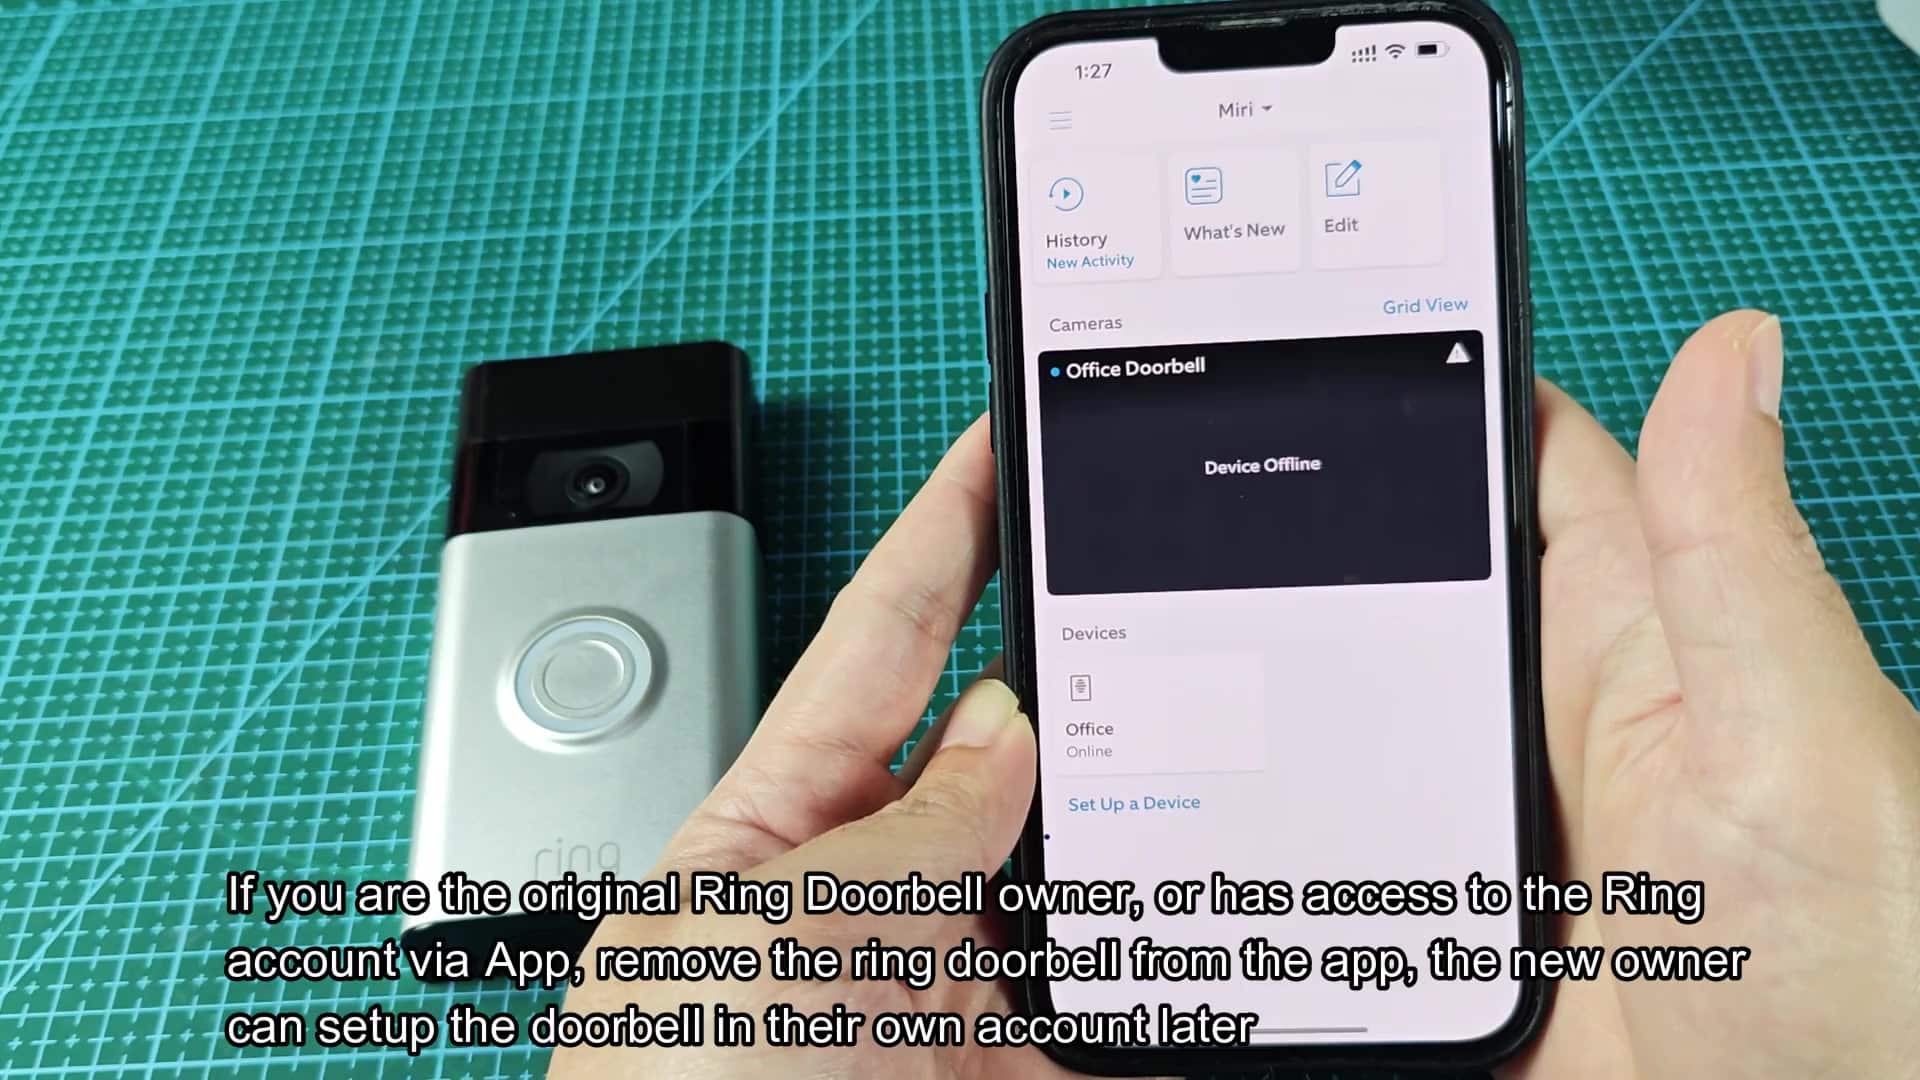
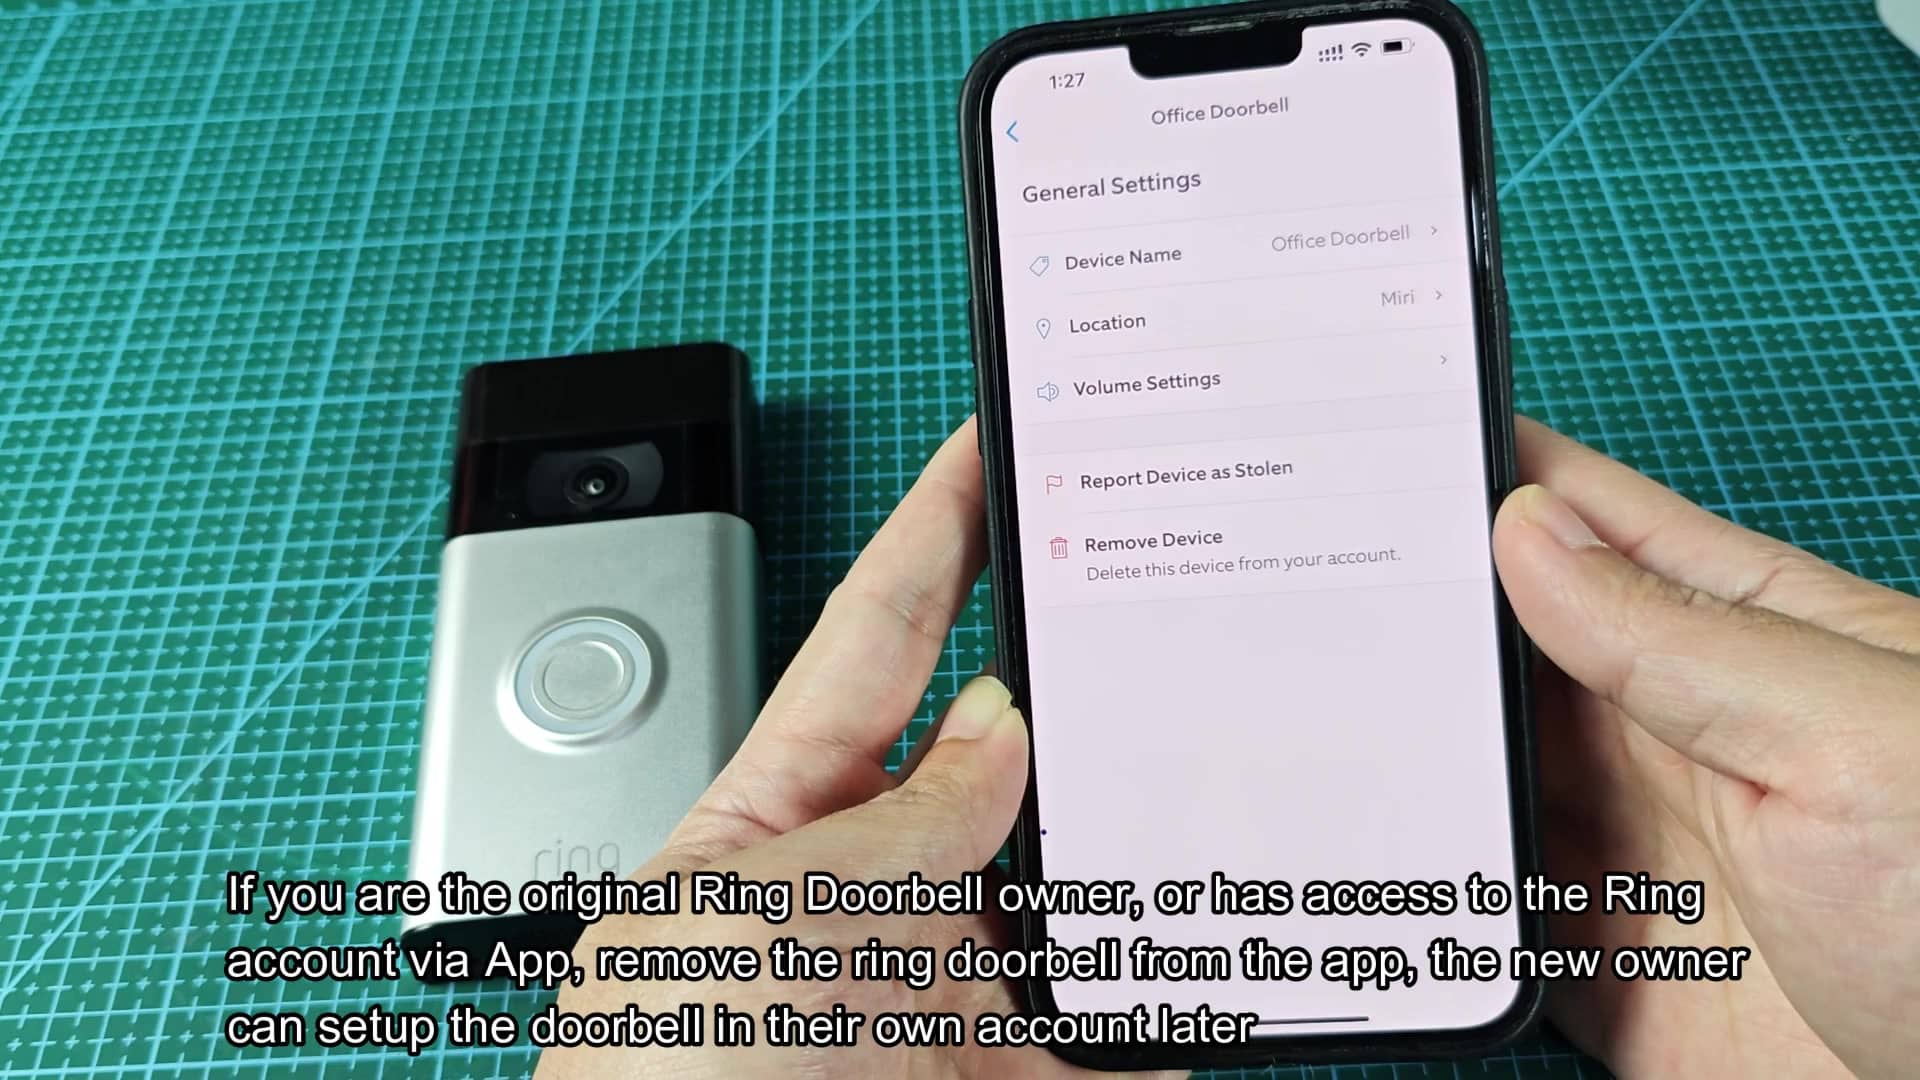
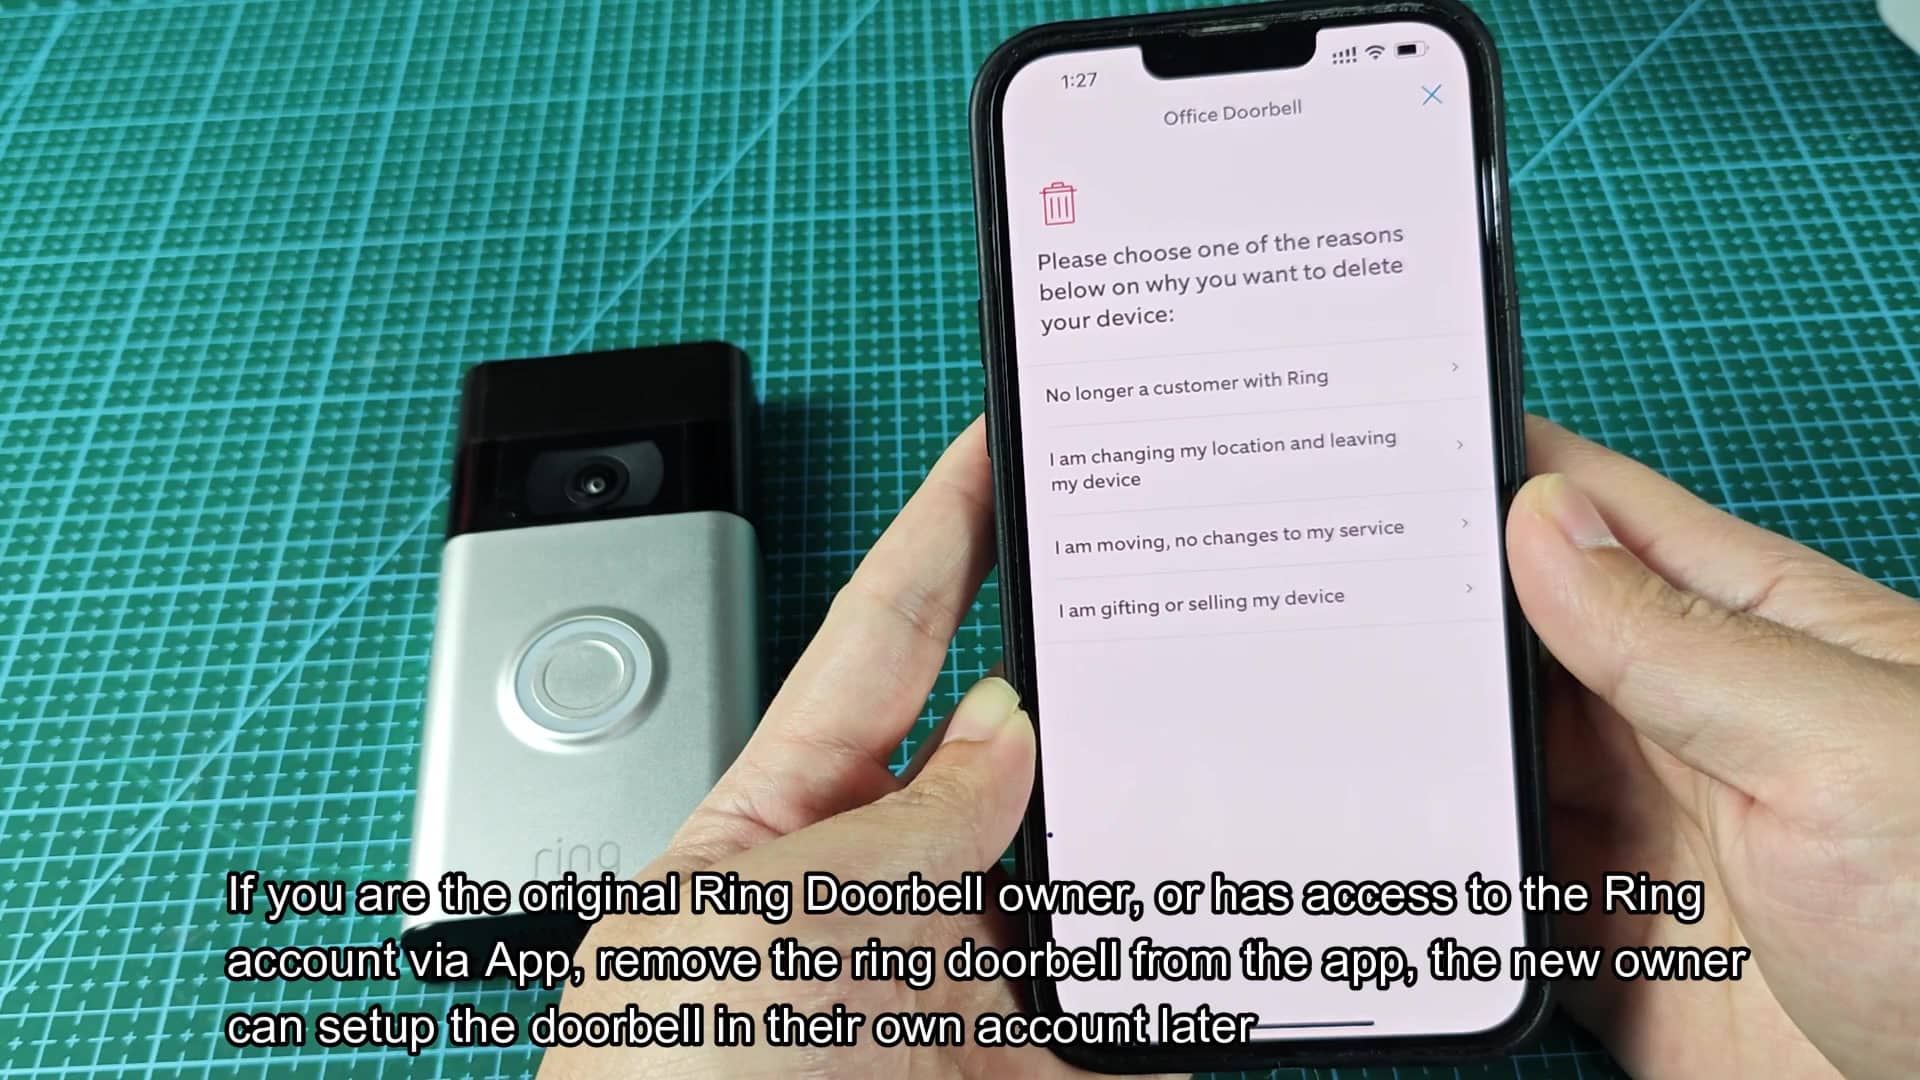
Transferring ownership of a Ring Doorbell depends on whether you have access to original account, but there is a secondary process if you do not. If you registered the doorbell yourself, then you’re good. Simply take it out of your Ring app and make it available to the new owner. It will reset everything and allow them to claim it with no digital hurdles. So you pull up the app, you scroll around in all of menu items. And then you go to exact place where the settings for this individual doorbell are located. So you press on the device settings. And then scroll down to general settings.
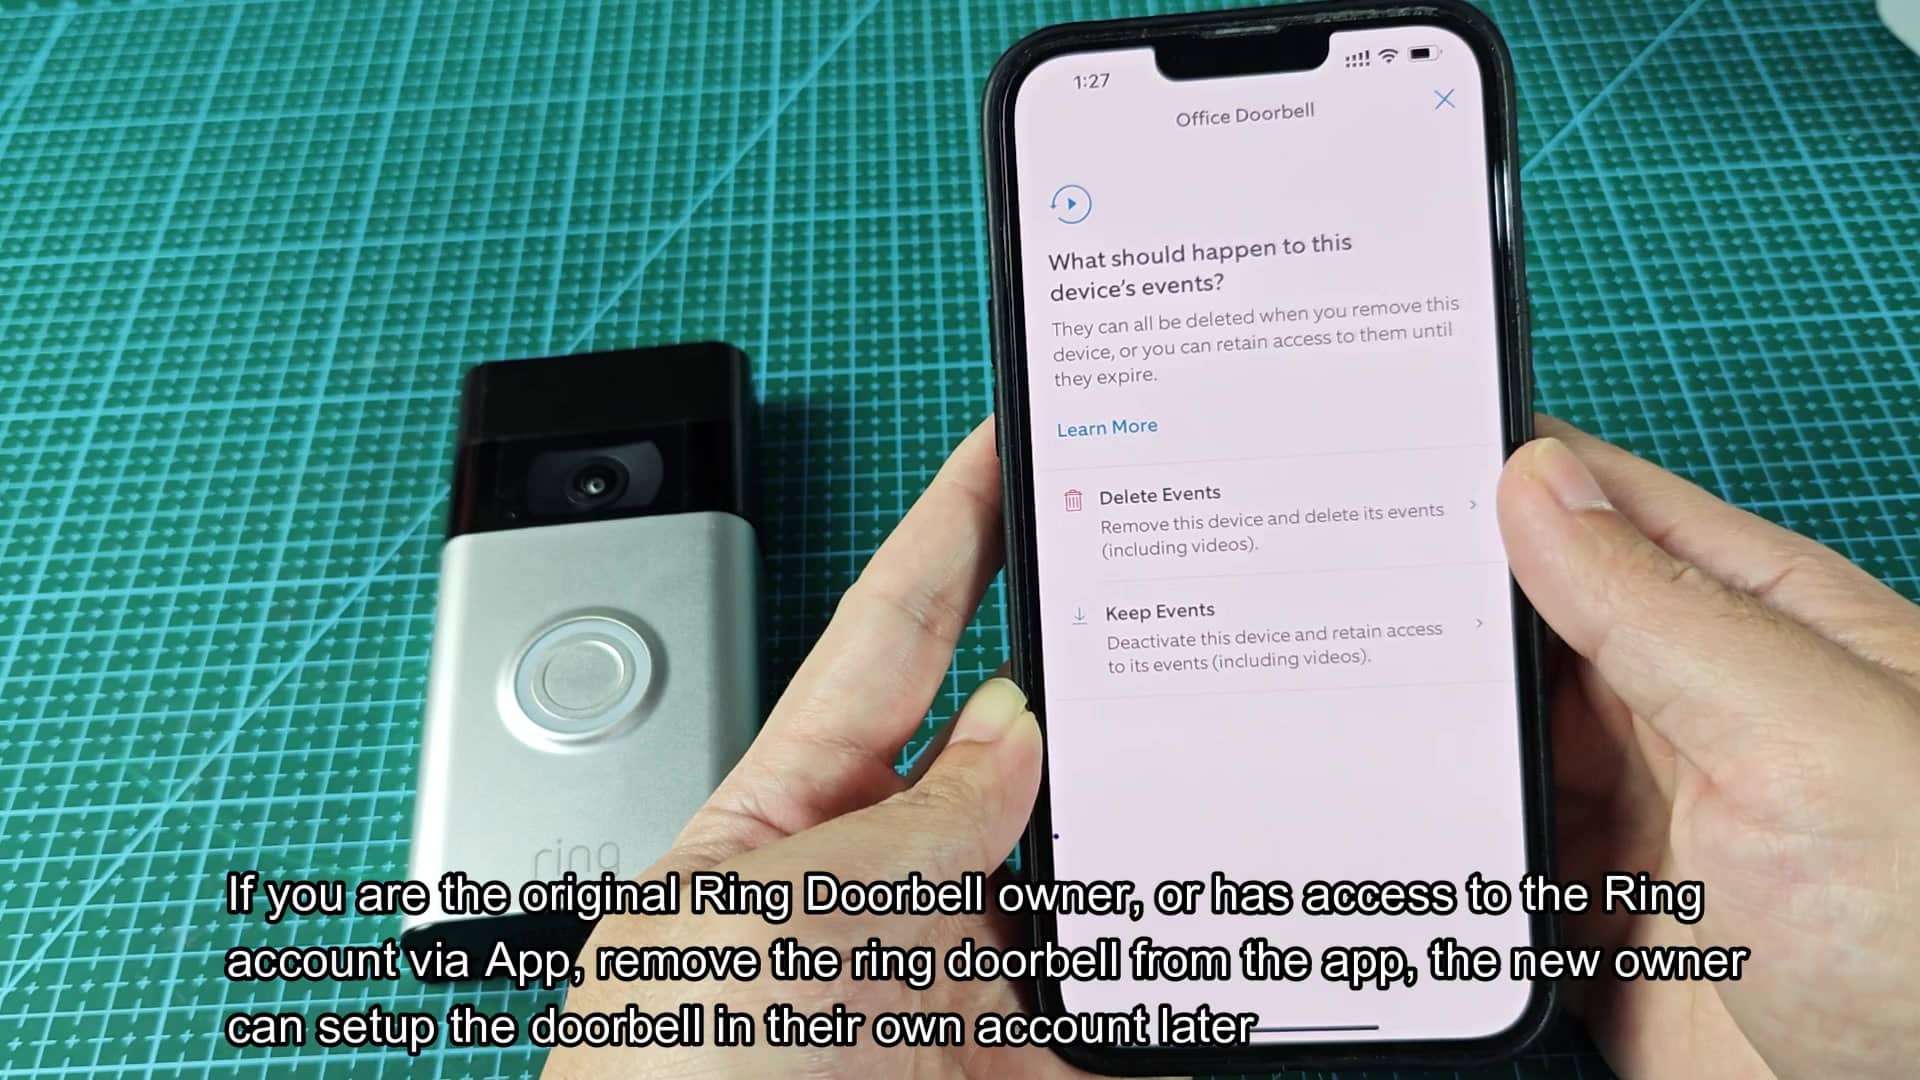
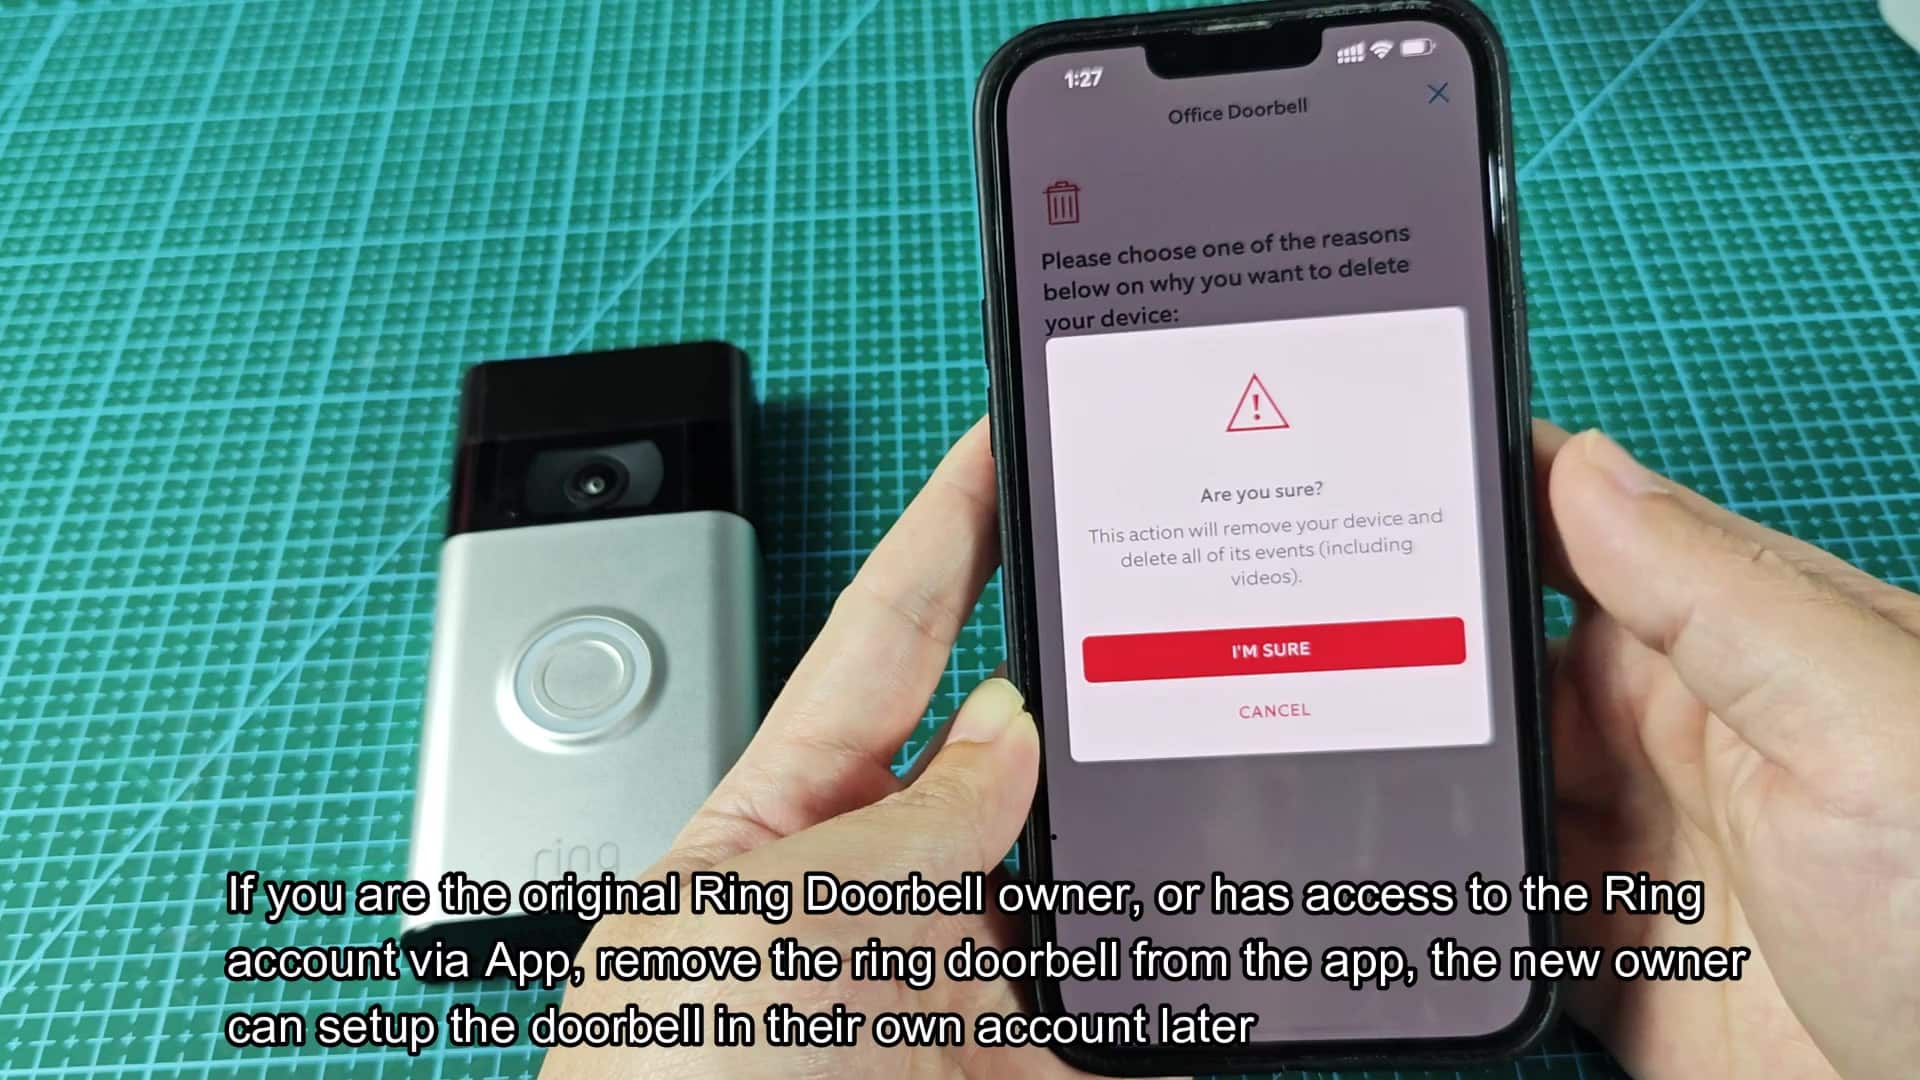
And that’s where you’ll find the remove device option. It seems pretty harsh but it’s only removing the link between your account and piece of hardware. Not the actual piece of hardware itself. It is just the digital connection. Nothing is done irreversibly without your confirmation in the app. When the app shows you all of your previous events, you must decide which ones to delete and which ones to keep. Select to delete them all. The new owner will want a blank slate. That keeps their event history nice and clean.
Transferring Used Ring Devices
Then it will ask why you are deleting them. You can select from options like giving away the device or changing location. This lets Ring know about possible future support issues. Once they pick a reason, then verify they’re certain they want to delete it. And after that (boom), immediately, the doorbell is no longer in your list of active devices. Doesn’t make the camera bad or broken. Just means nobody claims it right now.
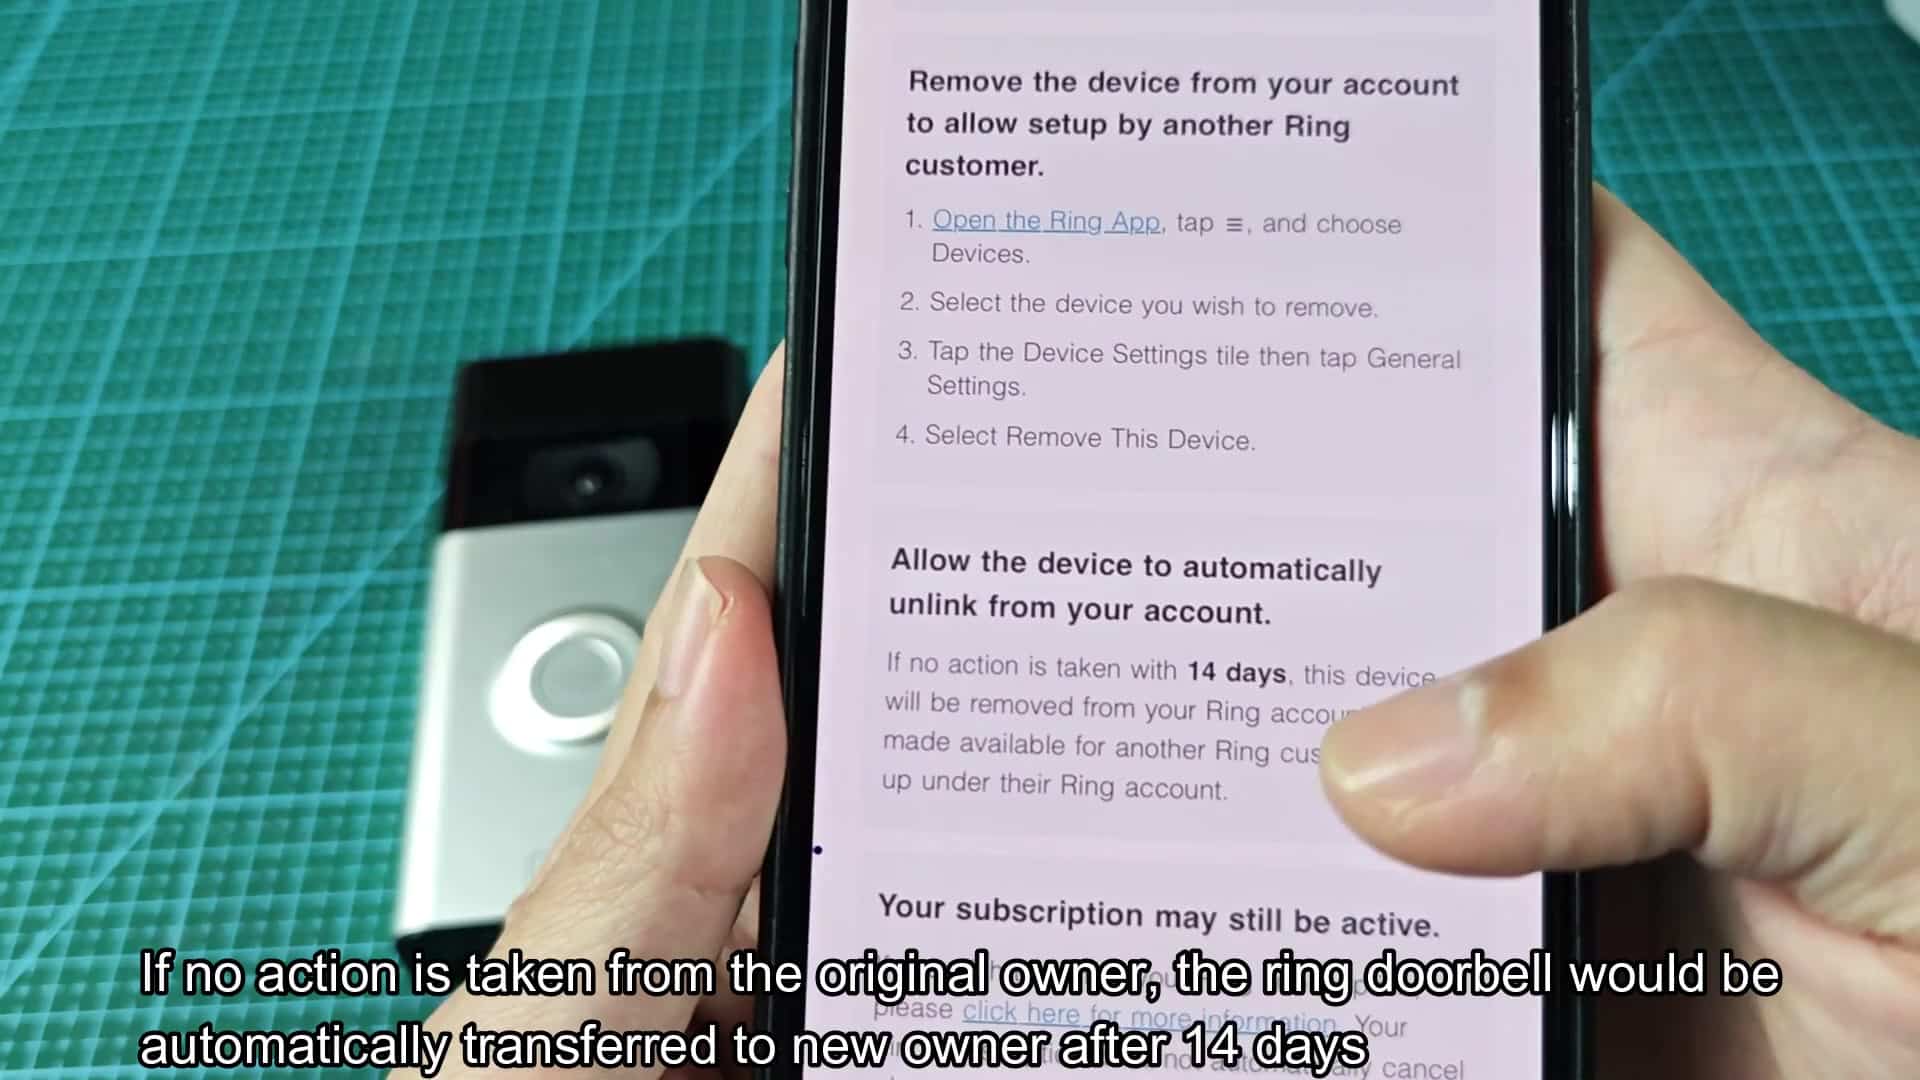
Now the new owner can come along and set up themselvess with their own phone without having to punch through your credentials. However, things get more complicated if you are buying a used Ring device. In this instance, you can initiate a transfer request that will automatically complete if original owner doesn’t respond within fourteen days. It will no longer allow you to force your entry into another person’s home security setup.
So what do you do? You need to physically reset the doorbell yourself. You have to reset the doorbell in real life. This essentially removes it from the old owner’s WiFi, while also putting the doorbell back into discoverable mode (in order to add it to yours). It’s a hardware override; one that bypasses software permissions first. Usually the reset button is on the back of the device. You press it and that takes the device offline momentarily. Then, when it’s no longer connected to the internet, you use your phone to scan the QR code on the doorbell.
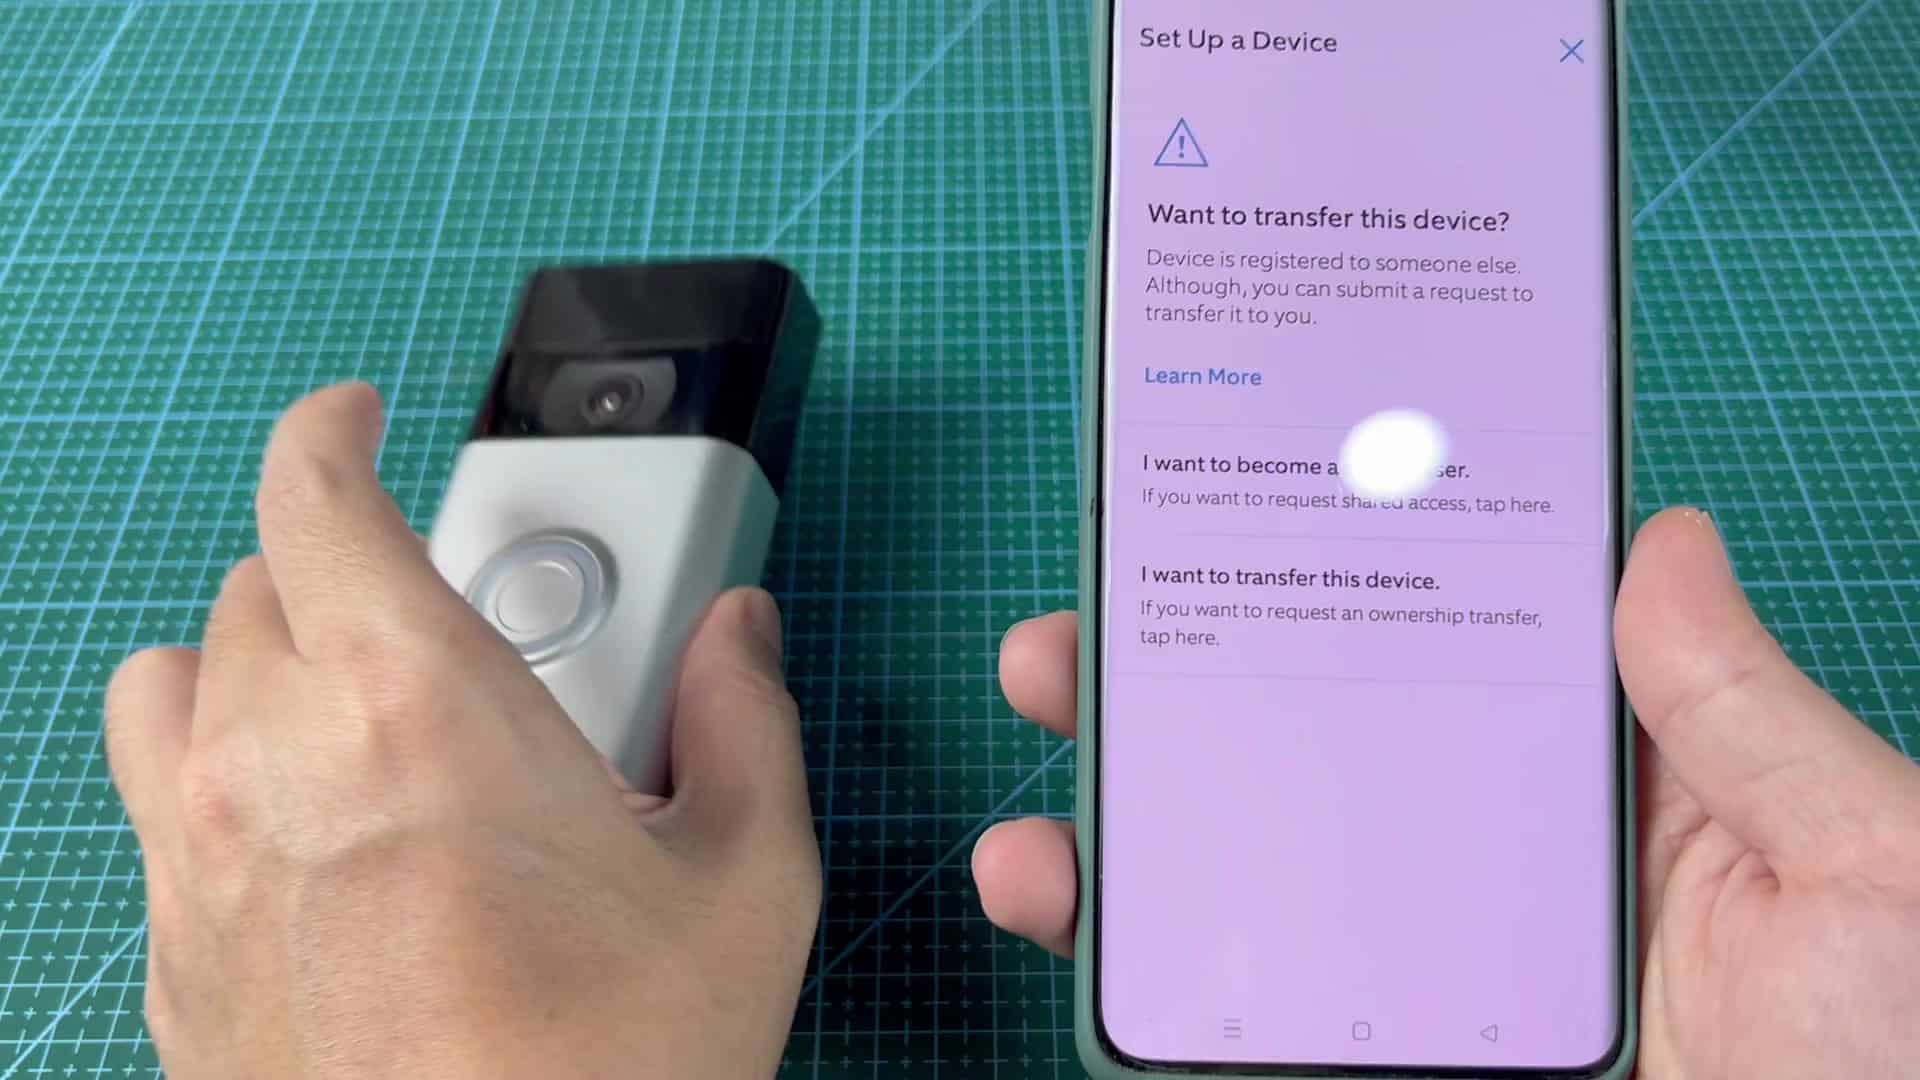
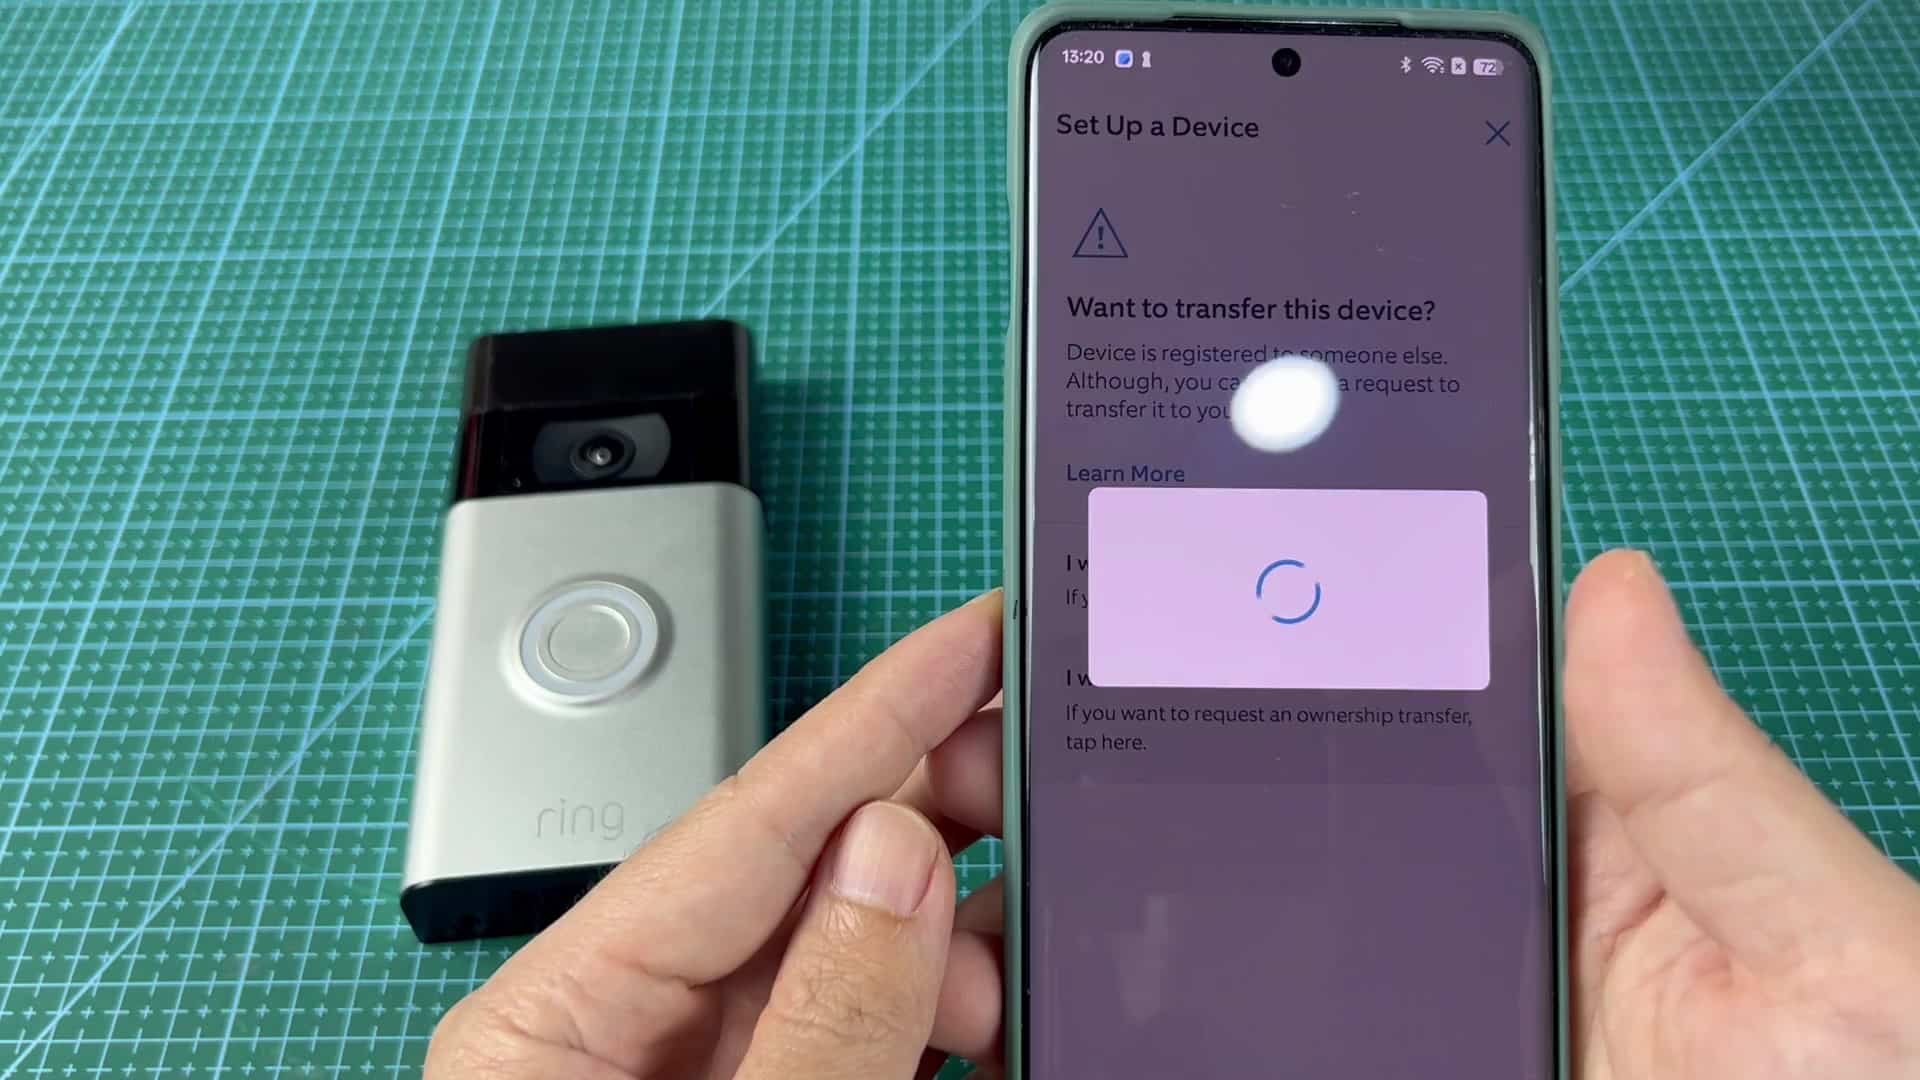
Your phone knows it’s a device, but it knows it isn’t yours. It doesn’t allow you to add it right away. Rather, it presents an option to transfer it in this particular situation. The phone appears with an option to send it over to you. You click that button and it sends an immediate request. Straight to the original owner’s email.
You’re warned: “it may take up to 15 business days.” While it does feel like a long wait, it safeguards against unauthorized transfers or theft. There’s time for the original owner to check in and approve or deny the request. Ring emails the previous owner, too. There’s no mystery: it tells the recipient someone is trying to configure their doorbell. If they’d rather take care of removing it, there are clear directions in the email instructing just that: log in to the app and erase it yourself.
In other words, they maintain control over what happens with their stuff, even when they’re not using it anymore, like when they give it away or sell it. They either accept or deny the transfer. But what happens when they simply don’t respond? Well, that’s where Ring uses a timeout for this situation.
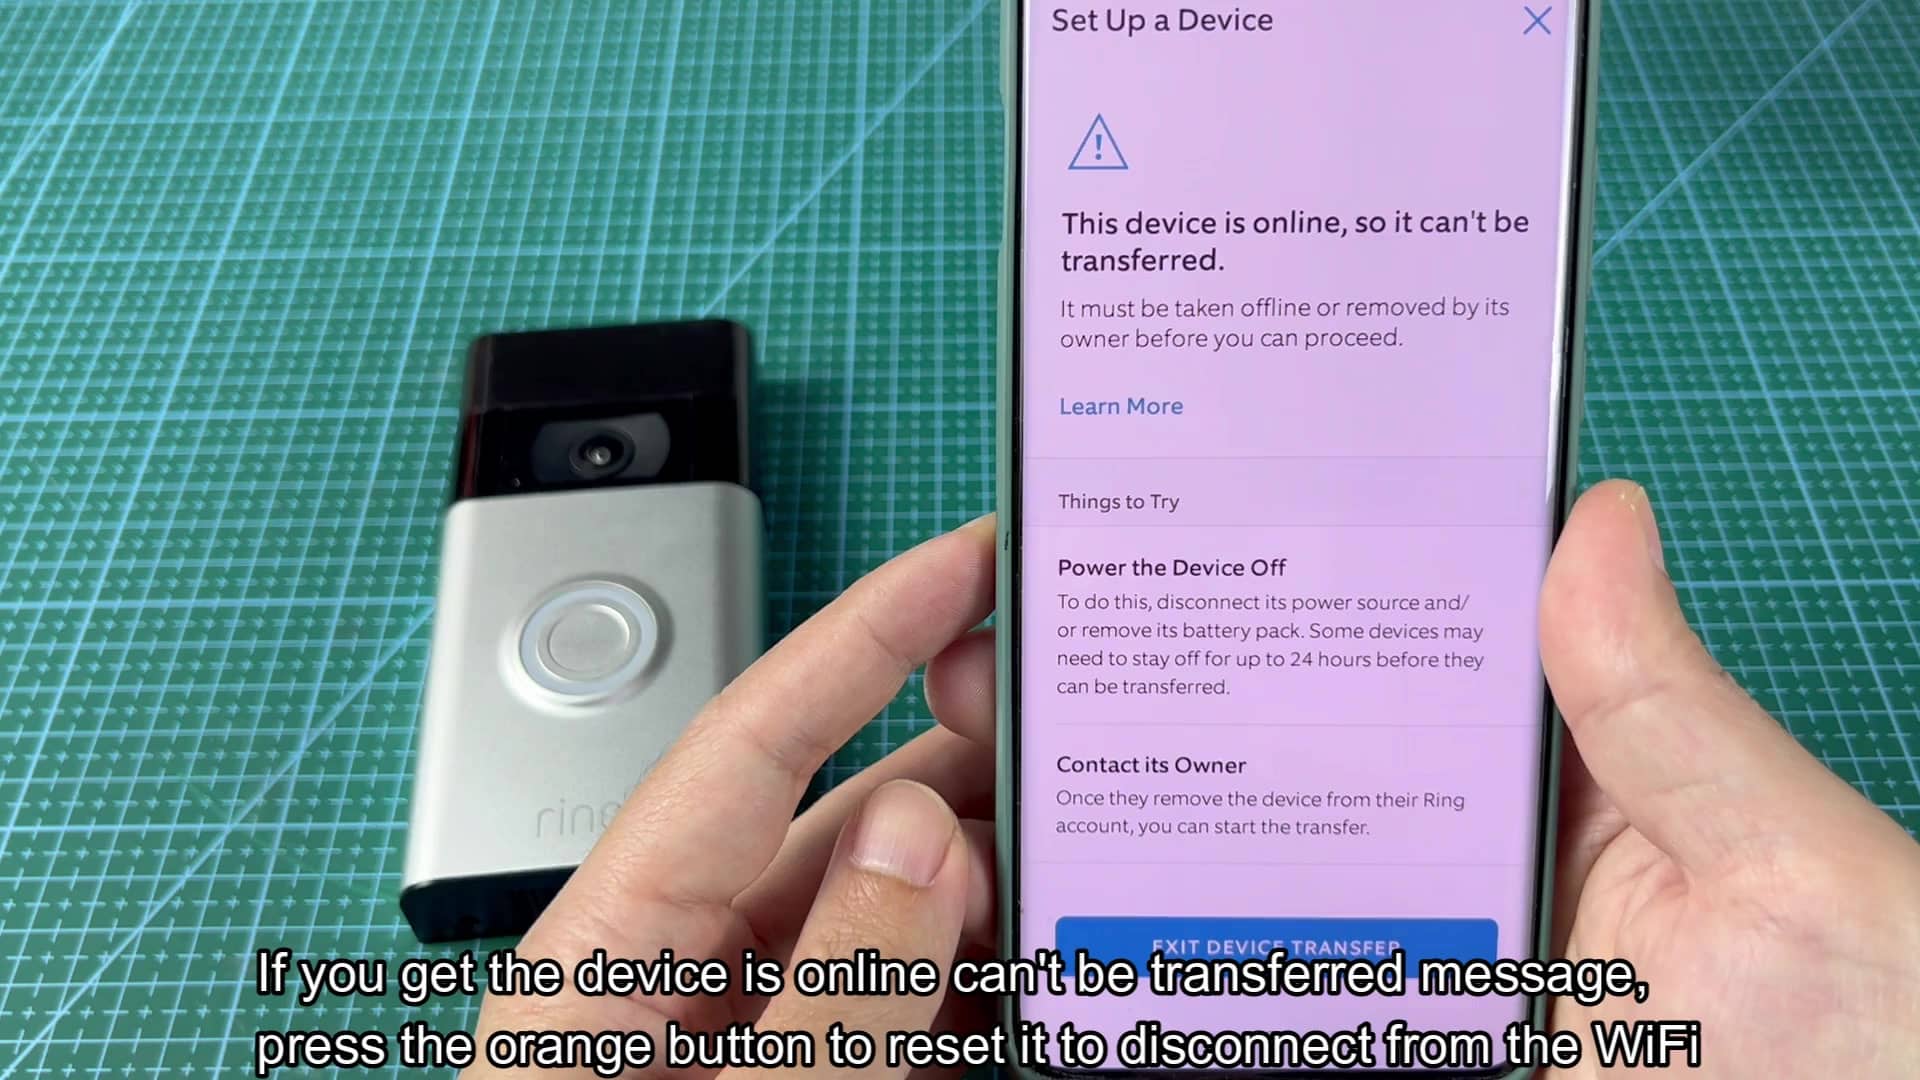
By default, the system will wait fourteen days before assuming there was no reply and just transferring ownership anyway. That way, abandoned devices won’t hang around in limbo indefinitely. Then you sit there in a state of suspense for those two weeks without anything happening. You can’t live with a non-functioning doorbell and it’s kind of nerve wracking.
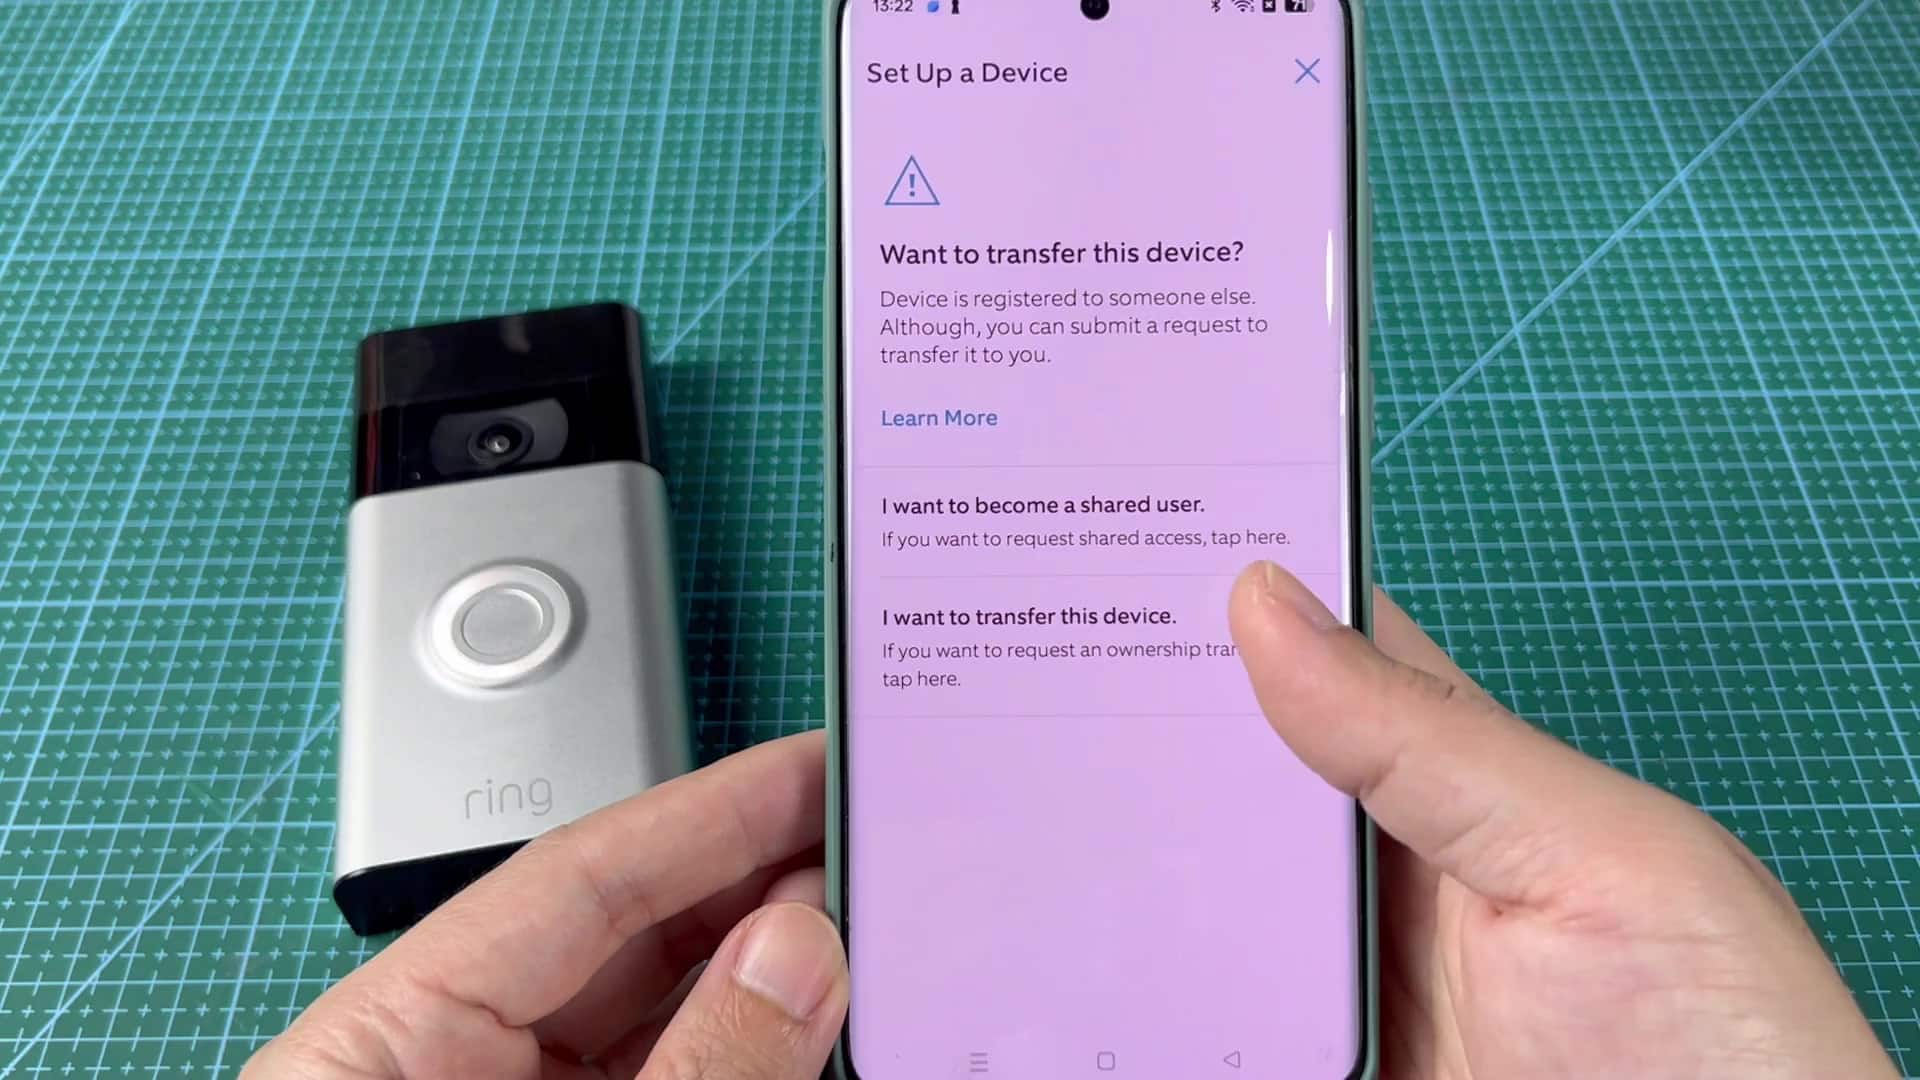
Then something happens on your phone. The status changes on your phone and the transfer completes successfully. And then it shows that it succeeded! And the thing transfers over and all is good. You have been waiting for a long time by this point. After two weeks of nothing, the link to previous owner’s account becomes permanently severed. From then on out, the device appears available to set up from your phone.
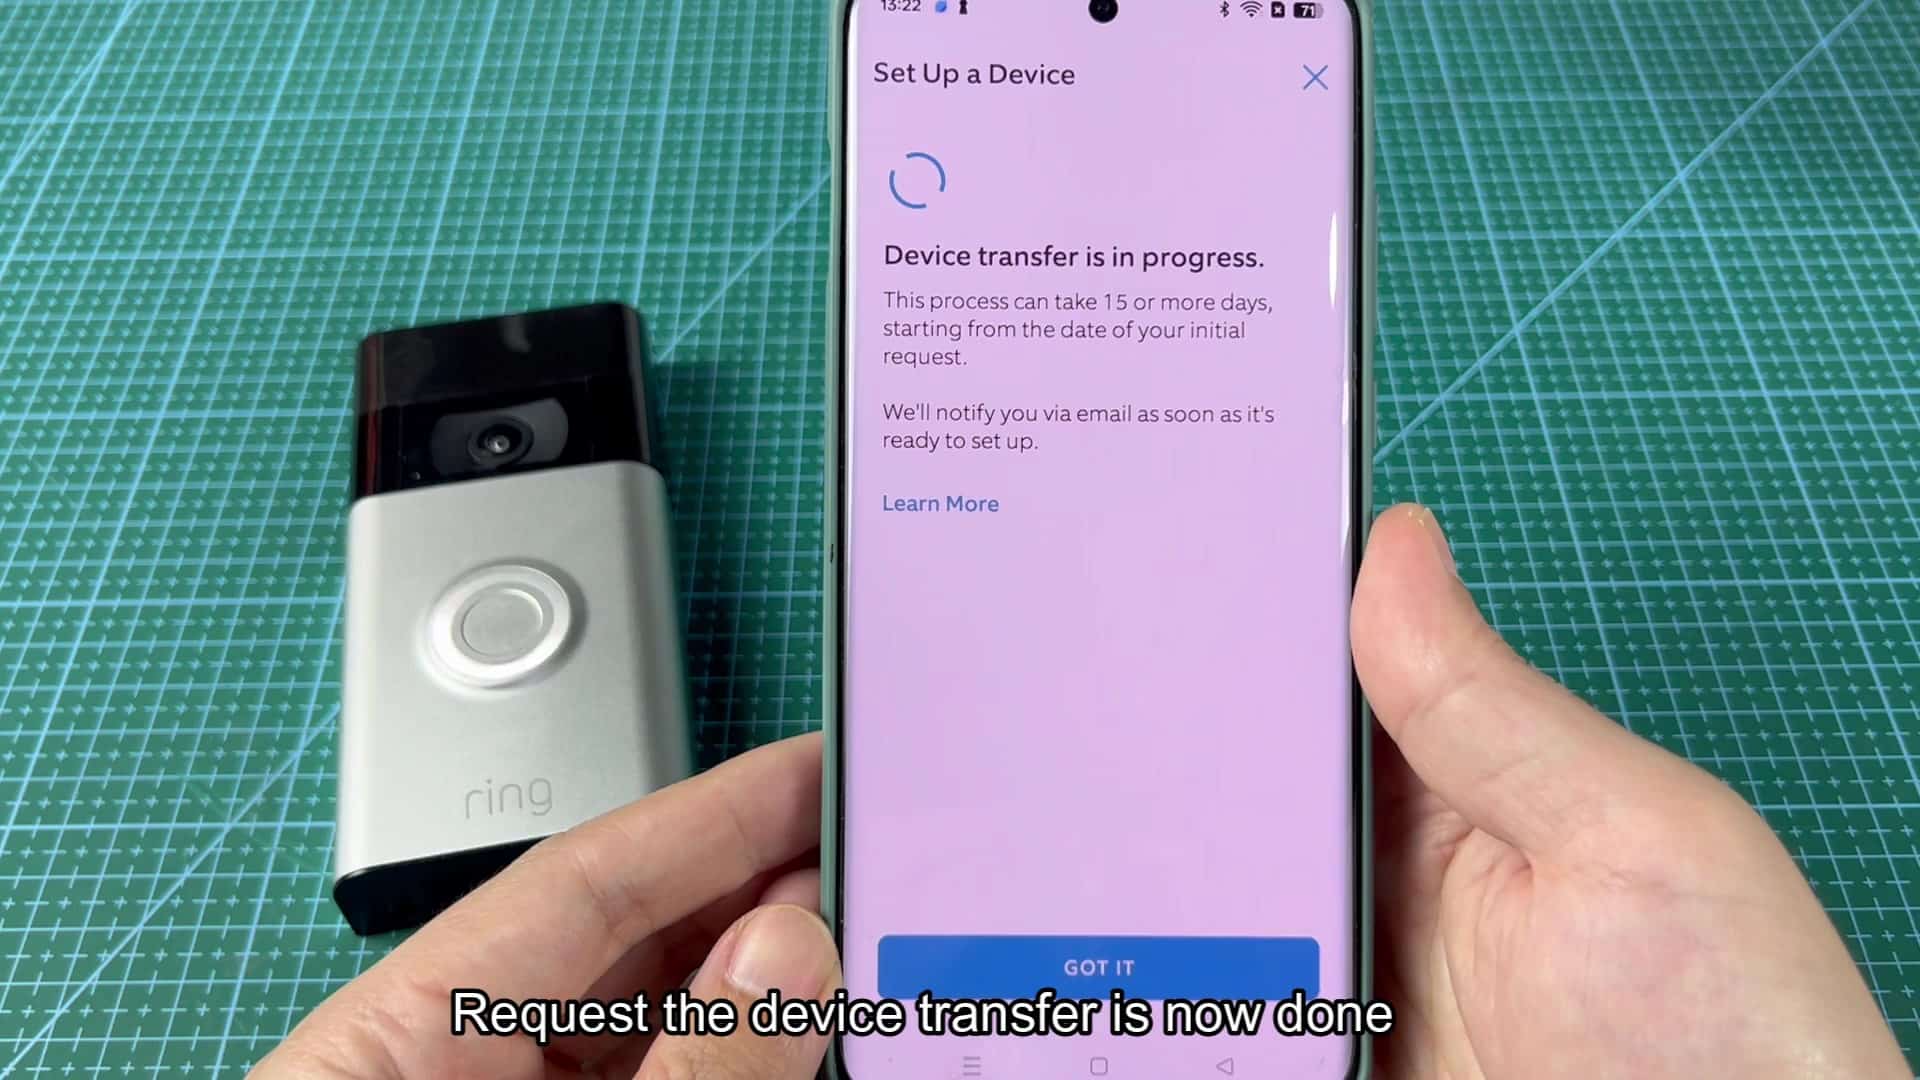
Follow the usual instructions, just like you would with any fresh piece of gear. This time, everything goes off without a hitch. There are no more pesky error messages regarding previous registrations. It’s simply a nice, clean handshake between your phone and the device. The moral of this story: Patience is a virtue when it comes to Ring transfers. If you’re buying one, or selling one, go through the right channels. Don’t attempt to work around the system.
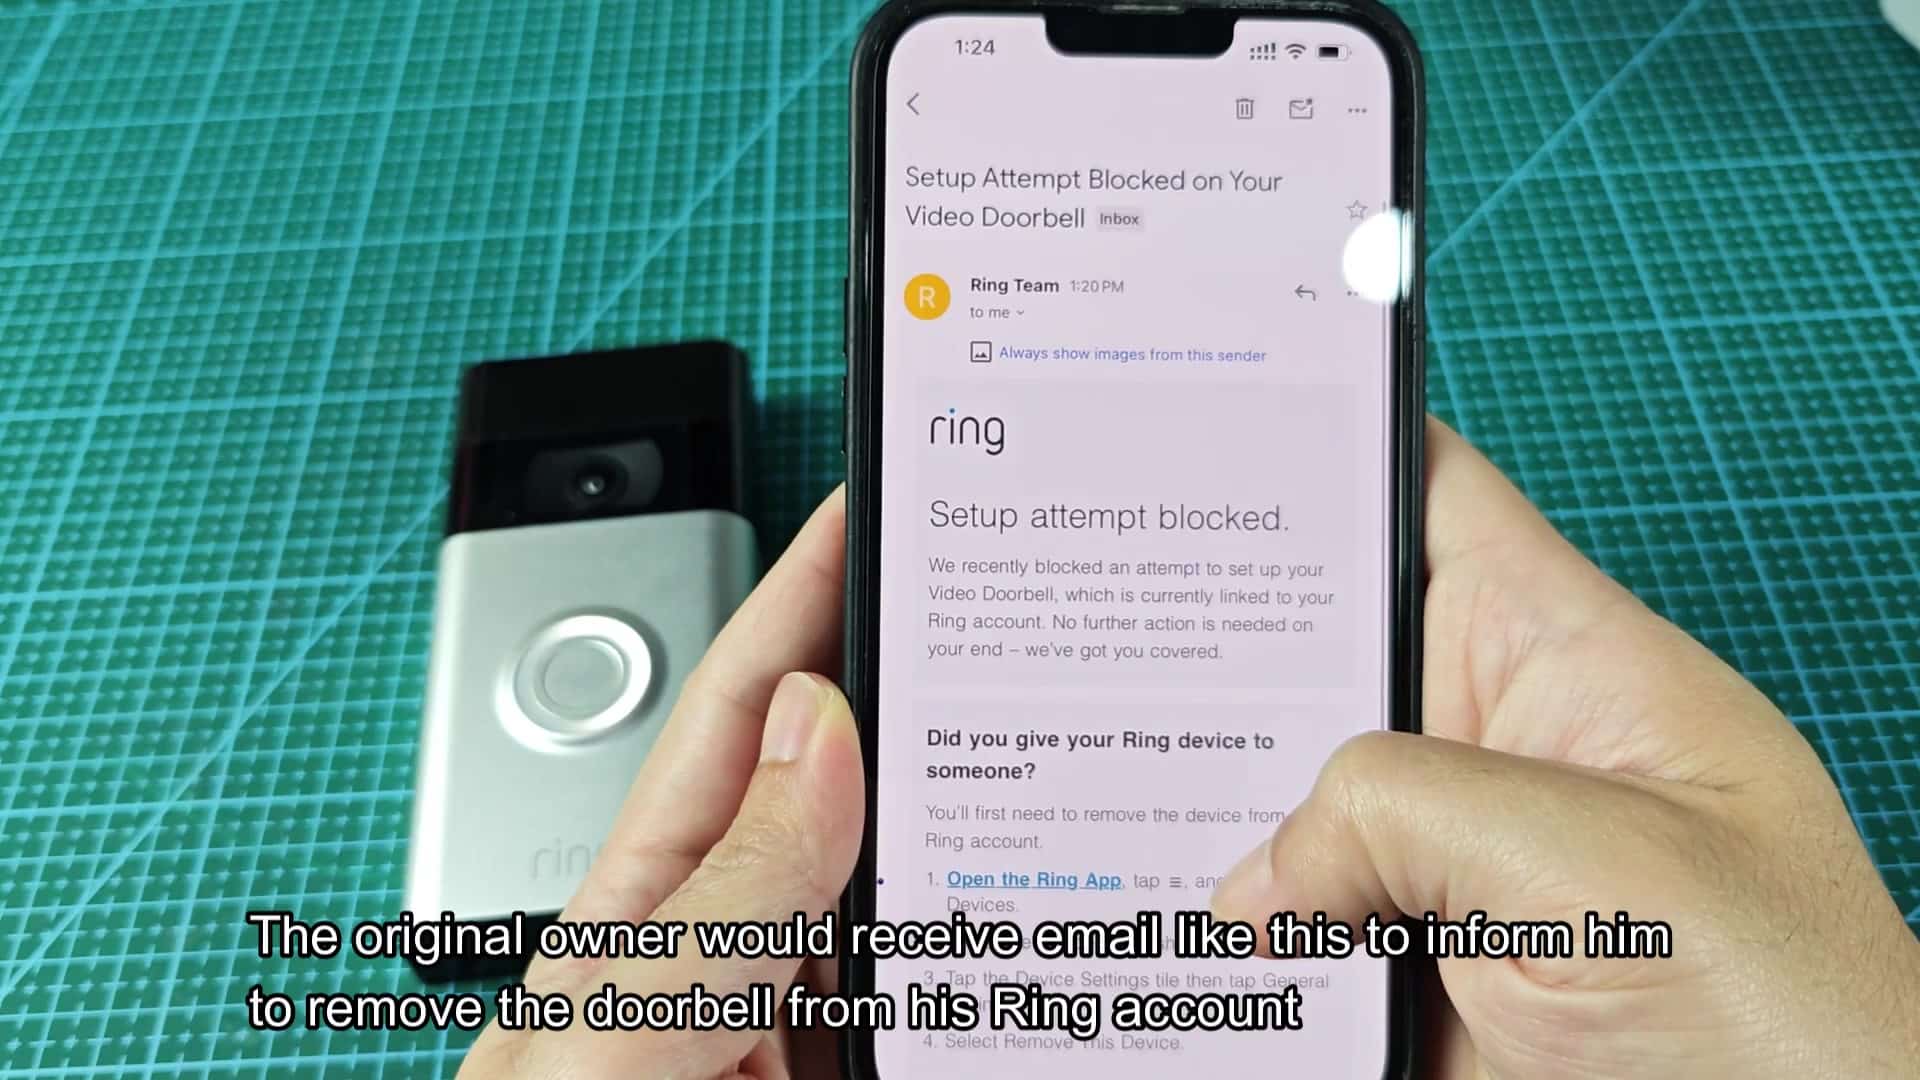
Use the native transfer feature, it’s secure and establishes permissions for everyone involved. It lets both buyers and sellers know what’s going on. And if no one answers the call, time will be on your side as you take ownership of the device.