
Your LG front-loading washer fails to dispense detergent and/or fabric softener during the wash cycle, but it does not shut off the machine. It’s because the dispenser mechanism isn’t working correctly; the chemicals are still in the drawer. If this happens to you, first remove the drawer and check the compartments.
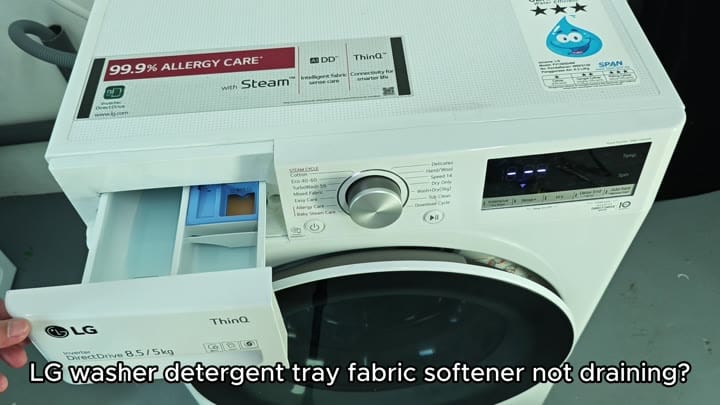
First off, check your fill level. The number one cause of failures is an overfilled tray. The system can’t handle the flow if you pour too much in the slots.
Testing the Solenoid Valves
Also take a look at what type of product you’re pouring. Gel-type products tend to have issues. They are just too thick and sticky to get drawn out effectively by the mechanism. Using a lighter detergent prevents delivery lines from clogging up.
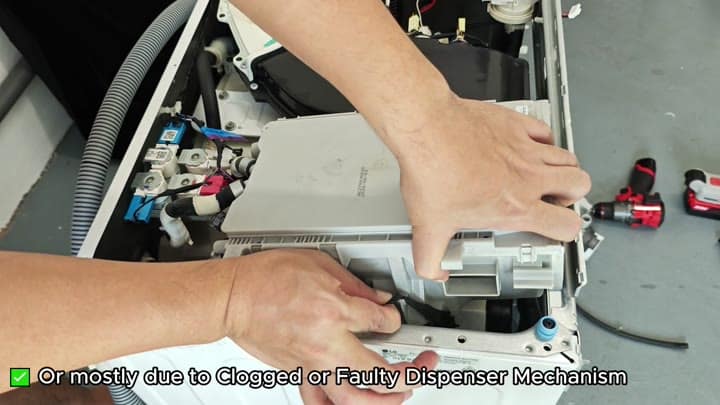
After you clear out the tray, pull out the whole dispense basket so you can look in there and make sure it’s clean of all residue and blockage.
There should be a water inlet line from that solenoid valve running up to a dispense module. It’s connected directly to that solenoid valve. That’s important because without that, those chemicals won’t move on their own. Water needs to be flowing in order for them to get pushed through.
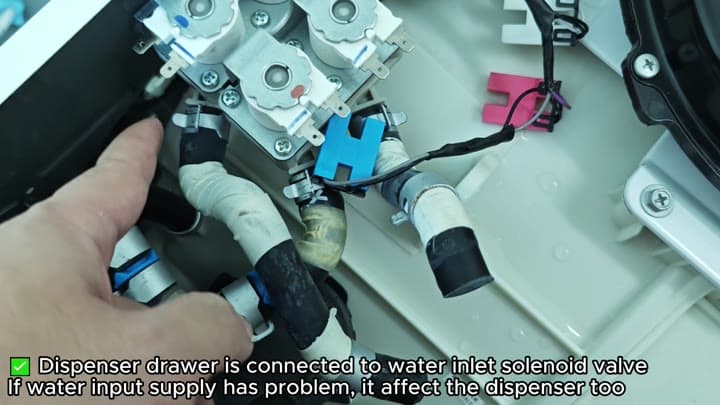
Water input supply problems directly affects the dispenser function.
The dispenser stops if it run out of water.
The dispenser function also connects directly to the water input supply. Pressure pushes the soap out through the valve. If there’s no pressure, then nothing gets pushed out.
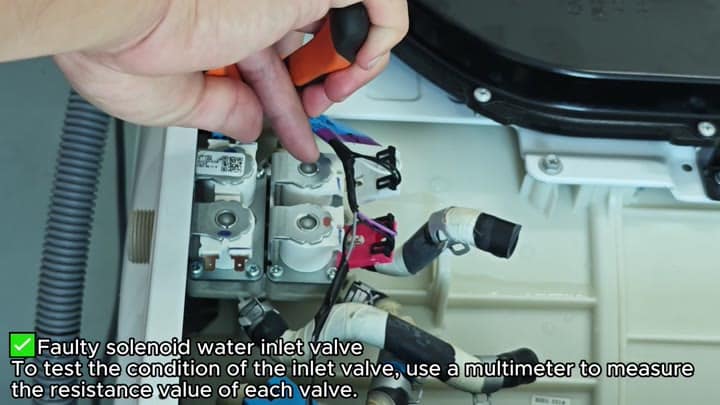
So you’ll want to confirm whether or not the valve is functional. Next, it makes sense to grab your multimeter. Use this tool to test each of the solenoid valves and find out their condition.
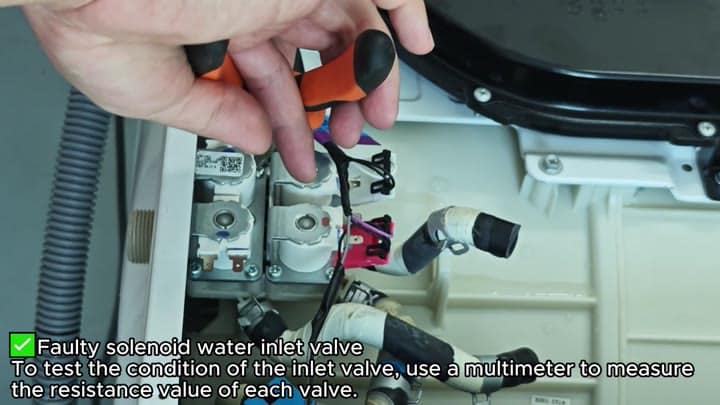
Probe each solenoid valve individually to check its condition. This is how you identify a faulty component.
How do you know if one of those components isn’t working?
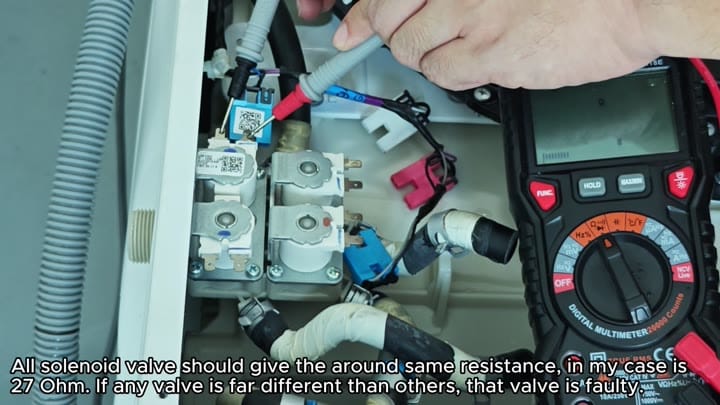
With your multimeter, record the resistance reading (in ohms) of each valve. Doing so will let you know whether or not the electrical component inside it is good. All valves should have very similar resistance readings.
Again… Consistency is what you’re looking for. If one has a very different reading than the others, then it’s a bad valve. There is no easy way to fix this. You’ll need to replace it with a new one.
In this example, the target resistance was roughly 27 Ohms. All but one of the valves registered near that figure. That told me that all but one of them were working within their normal operating range.
One valve, however, read significantly different than the rest. Not only did it not conform with the other parts, but it didn’t even come anywhere close. And that is why it should of been written off.
Turns out it was all about the bad valve.
The issue was resolved by replacing the bad solenoid valve. The washer returned to normal functioning and dispensed a washing load. Once you know what to look for, it’s an easy fix.
A lot of folks just replace the whole drawer without even checking. Wasted money! Resistance check is a cheap diagnostic step. Saves time and effort down the road.
Correct water pressure is key to chemical release. If there’s no pressure, then there’s no go. Multimeter testing is simple but powerful. It locates the spot of failure instantly.
Why guess when you can have numbers? Resistance measurements tell all. Compare them, and it will jump out at you. Usually.
These troubleshooting tips apply to other units as well. Test for blockages. Electrical components next. Replace the valve if it has incorrect resistance.
It is pretty simple stuff. There are no complicated tools here. A multimeter and some general know-how will do.
After swapping, the washer was reborn. Mixing the water and detergent is as it should be. The fabric softener comes out on cue. The washer runs through its cycle like a charm.
As you can see, this wasn’t a hard fix to make. It was just a matter of working step by step. Pay attention when something starts acting funny. Fix it before it gets worse.
This is a classic overfilled tray error. More soap = clean clothes? No. More soap = clogged up system. Follow the amount suggested for a load.
If your detergent flows better as a liquid, use that. Some machines have trouble with thick gel. Your results may vary depending on your machine; this is just my experience with one appliance.
The trick with this was trial and error. I found that I had to compare the valves side by side. The one that didn’t fit the pattern was obviously the odd one out. That was my giveaway.
No need to disassemble the entire machine. Just check the valve terminals. It is a big time saver.
Was the repair worth it? Absolutely. We didn’t buy a brand new washer. The parts weren’t expensive either. Always fix before replacing.
If you’re having a similar problem, give this a shot. It’s a great solution for faulty and/or clogged mechanisms. And, the process isn’t super-technical. Anyone who has a multimeter should be able to complete this task.
