
First, test physical connection. Plug it back in and ensure your power cable fit snugly into the adapter. Give it a slight tug; if it feels good and the port doesn’t move, then all is well there.

After that’s established, pick up a multimeter and test for actualy power delivery from that equipment. You can’t be certain without it. The dial should of been set on DC voltage and the scale will be determined by what charger label states as its base. If it’s a 20V output charger for instance, then that’s the number you’ll aim toward before poking around with things.
Testing With A Multimeter

There is two terminals on the output connector. Touch one of the multimeter’s probes to each of them. Don’t short anything out or else.
Now you’ll see a reading appear on your meter’s screen, but don’t be surprised if it appears as a low number at first glance. A reading of.0059 volts make no sense at all, so double-check your probe placement. Check that you’re touching the right spot with your probes.
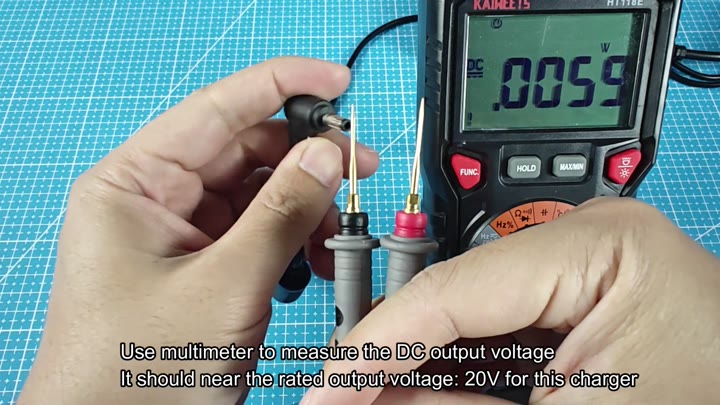
If you get a bad contact sometimes it’ll give you bogus information, but just move the probes around until you have good metal-to-metal contact and your reading will instantly jump up. It should level out at 20.50V which is right on target.
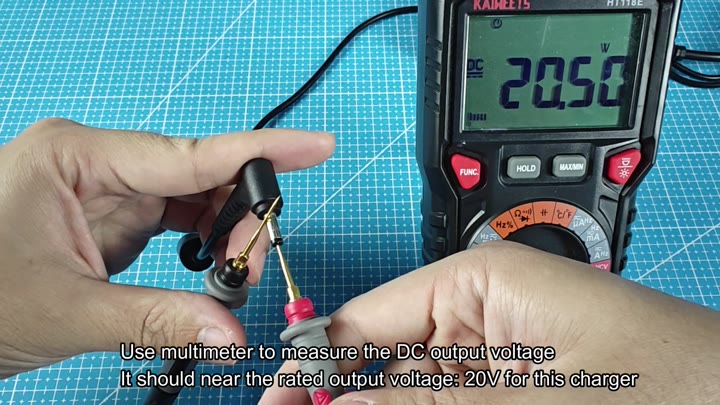
So how do we compare that measure against the label? Use charger label as your baseline to see if it’s outside of normal tolerance (a little more is usually okay). If you’re seeing way less than what’s printed on there, it means your charger are probably busted, but that is not the case here.
But if you’ve got the proper tool, it’s a snap. A lot of folks will toss a perfectly fine charger because they think laptop is busted and won’t take a charge. More times than not, though, it’s just a loose plug or a dirty port.
There’s no guessing when you use a multimeter. A little electronics know-how and no expensive diagnostic software is necessary. Simply check the voltage. Any voltage at all indicates a good power supply, provided the labeled voltages matches. Zero volts or something close to zero indicate a dead unit.
If you pass the test, leave charger in your bag for awhile more just in case. Since then, I’ve had no problems with it, and it has saved me the cost of buying another charger when I didn’t need to. Official accessories has gotten more expensive at retail lately, and every dollar saved on replacement parts add up.
Don’t trust the LED indicator. While it’s useful, some chargers continues to light up despite the voltage output being too low. The multimeter doesn’t lie. It spits out an exact figure and that is what you should go by.
It’s easy enough for anybody to perform. No, you don’t have to be an engineer. Find your voltage spec, find the reading, compare the two numbers and then decide. It’ll take less than two minutes.
Most of these chargers will still work. They just become scapegoats for whatever else might go wrong. If there’s any question whether a charger is busted or not, use the voltage test. You can then rule it out or confirm it is broken. It doesn’t matter, at least you know. This method works across various Lenovo model. They just become scapegoats for whatever else might go wrong. If there’s any question whether a charger is busted or not, use the voltage test and clear it from suspicion or confirm its fate, it doesn’t matter, at least you know. It works with various Lenovo models.
The procedure stay the same regardless of wattage. Simply read the label on your charger and it’ll tell you what voltage it needs. From there you just probe and compare.
Power trouble sucks but this test will give you answers. You will no longer have to guess. It is just cold hard data.
