
Sometimes your PS4 controller will have trouble with a D-pad that doesn’t seem to register input anymore. Most of the controller still work fine, though.
Don’t freak out, it’s probably not time to go buy a new controller yet. This is a fairly straightforward piece of hardware failing. The way these buttons connects into the inner workings of the controller isn’t quite as special as you might think. It’s just physical contact.
Internal Inspection And Fix
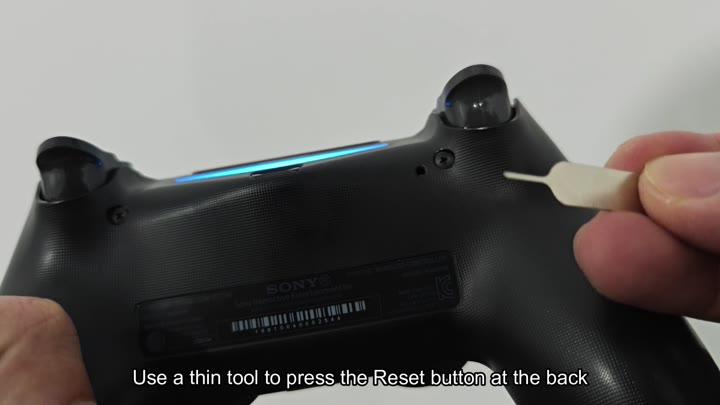
Before you do anything else (and without taking it apart), you might want to try resetting your controller. This is quick and simple, but there’s a little button on the back of the controller that you need a thin tool to push down.
That tiny button is located in a small hole, which may be enough to cure any strange software glitch. If this doesn’t work, you’re still out of luck with an unresponsive D-pad; that means the problem run a bit deeper than a temporary software glitch.
The D-pad resides in the front shell, on the left side, which means you’ve got to crack the controller open to have a peek inside. How does it work? It work by pressing a rubber membrane, which is a key part of how it functions.
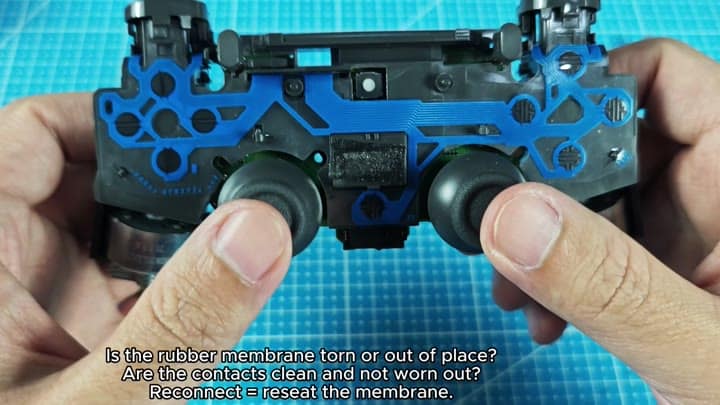
The membrane connects directly to the electrical contacts beneath it. You’ll notice those are coated with graphite, while the rubber sheet features pads that come in contact with the PCB’s circuit traces. If for some reason that connection fails, then the button doesn’t register.
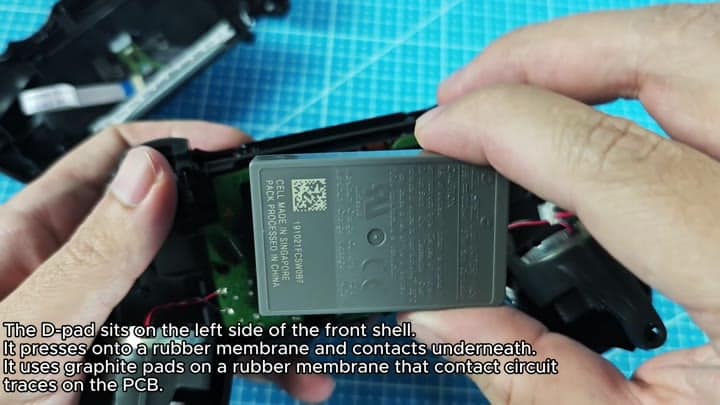
Here’s what it looks like inside once you open up the controller. You can see the battery here as well as other manufacturing labels and serial numbers.
What you’re looking for here is how the actual D-pad interact physically with the board. This is what connects the graphite pads of the rubber membrane to the computer chip. It’s not complicated, but it’s also delicate, which means it will inevitably suffer some wear and tear over time.
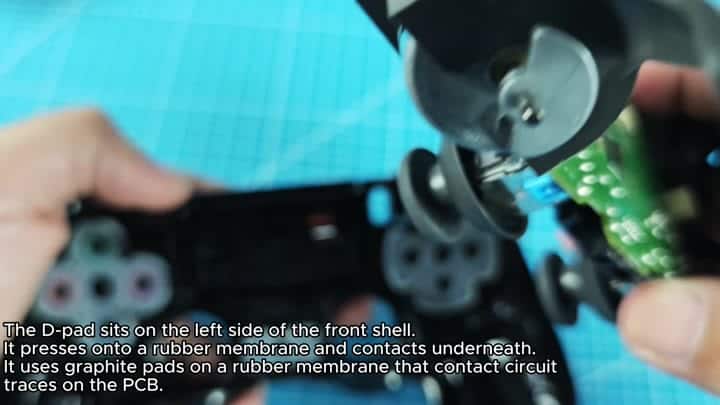
Now take a close look at that rubber membrane. It might appear to be worn, but it is still intact. The problem is that repeated use can cause the membrane to shift a bit, which makes it seem like it’s just sitting slightly out of place.
When that happens, the graphite pads no longer line up with the copper traces and that interrupts the electrical circuit. Look for any tears in the rubber and if you don’t see one, then the contact area might not be making good connection. This is why it won’t respond.
Look at the contacts to see if there is any dirt or grime between the PCB and the membrane. That insulates the signal and makes it not pass through. So just clean out that region.
Otherwise it’s probably entirely a matter of the mechanics of how well they’re aligned. Perhaps the membrane moved slightly off the sweet spot of where it should of been contacting. It’s hard to see.
Once you realize the change, fixing it couldn’t be simpler. You have to re-seat that rubber membrane, which in practice simply involve getting a little space under it and pressing it firmly back down on the graphite pads again. That essentially reconnects them to the circuit traces and forces everything back into place. Simply line up the membrane correctly with the D-pad assembly and go about your business.
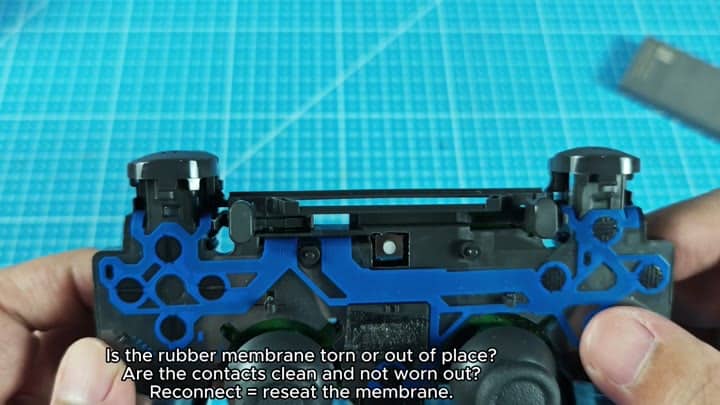
Place the membrane back in its correct position and press it until you are certain that it has made full contact with the pad. You want it touching evenly on every side of the D-pad.
You don’t need any fancy tools or solder here; this part is just about making physical contact again. Snap your controller shell back together, and you’re done. It’s fast and easy.
Hopefully that’s a fix.
Once everything’s back in place, test out that D-pad. It will be good to go again instantly, and up, down, left, right are all working exactly as they should.
The reseating trick restored the connection and proved there was no broken component, just a loose one. That’s actualy a common controller fail, especially on older ones, because the connection between the button and the board is a simple but fragile system.
It’s nothing too difficult or costly to fix, just takes a bit of care with the innards. Sometimes that’s all it takes to make all the difference. It’s a moddern problem that dissapears once you fix the contact.
