
If your controller no longer charges after being put back together, first make sure there’s nothing wrong with the physical connection. More times than not, the cable just got loosen up; nothing broke. A full reset does not fix hardware problems.
You press the reset button to stop software loops. If the battery indicator is still dark while the lights flash, it’s a hardware problem.
Diagnosing the Root Cause
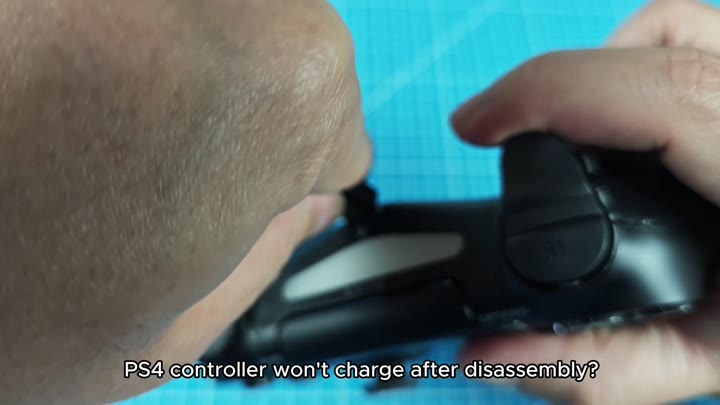
But first, if nothing else, check it out on the inside. That’s the flat ribbon cable connecting the two halves of the case (front and rear). It’s tiny and delicat. Check for a poorly seated cable.
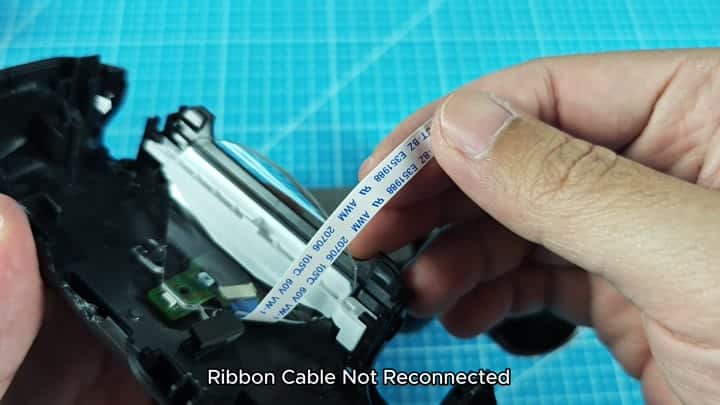
The electrical path is broken by a loose ribbon cable. Carefully, you tuck the cable into the slot. It’s flush with the connector. You plug the charger in. The yellow light says yes. Power flows. You confirm the cable was the issue.
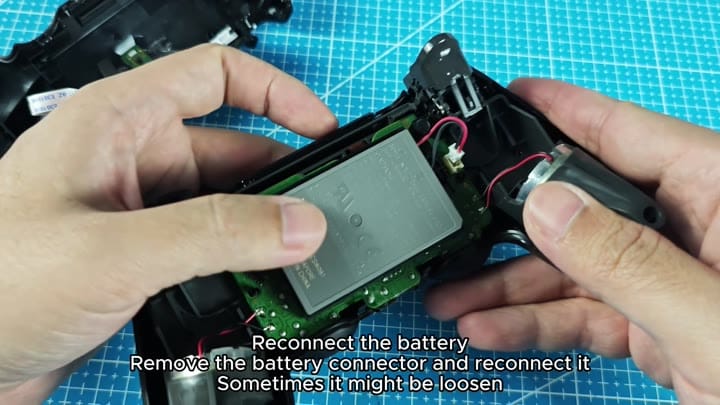
Also, check the battery connection. During reassembly, the battery plug can work it’s self loose. To inspect the contacts, you remove the plug.
You ensure the plug is inserted firm.
Make sure you insert the plug tightly. Make sure it’s not hanging out. Double check to make sure it charge again. If it’s locked in, the light stays on. A lot of folks close their case and get this one wrong.
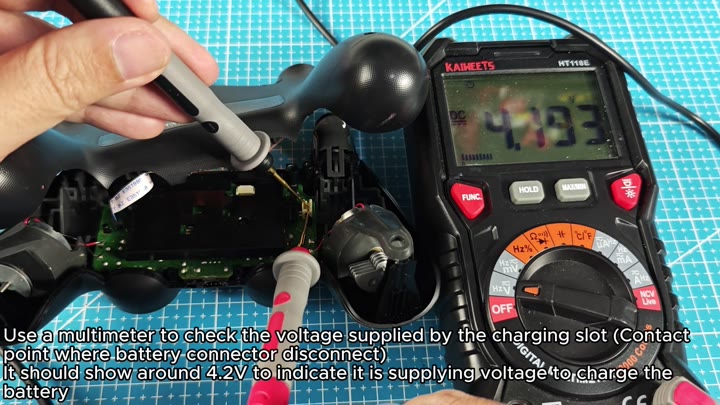
To do the voltage test, use your multimeter and check if the board recieve power from the charging port. Place your probes on the pin of your battery connector. Observe your screen for the number.
If you see anything close to 4.2 volts, then it’s a working port. It’s getting power to the inside bits. That’s proof that everything with the hardware are in order.
A loose cable isn’t an electronic issue, it’s generally a mechanical one. Fixing the connection saves your money. You won’t have to wait for a replacement. Don’t buy a new controller because of a loose cable.
Check the details and it’s simple. Look for gaps where the cables sits. Make sure the battery plug is tight. A bad connection fools you into thinking you have a dead battery. A plug is easier to fix than a board.
Alignment is critical with ribbon cables. If slightly off, they don’t work. Look for little gaps when closing the case. No need to guess.
Yellow light tells you straight up. It tells you current is flowing. Multimeter testing eliminates guessing. It displays the exact number of volts. It shows the truth about the power source.
Now you know it’s connected properly, so your controller is working again. It will charge as normal sitting on the desk. You do not need a replacement unit. You saved yourself some money and time.
All it took was a few minutes to fix it. And if you really pay attention, small details make all of this possible. For the system, that ribbon cable is key.
The good news is you secured it so no one can bother it ever again.
That’s where the voltage read comes into play. The voltage read says the port isn’t dead. So many folks think their port died. They think the port itself is busted. But it’s usually just a connection issue.
Testing voltage shows if it delivers power. That tells you if the problem is the cable or the port. If you see a good read, you know it’s not dead. You don’t have to throw random stuff at it in hopes it will work. You know exactly what went wrong.
It’s a learning experience in checking your connections, which you should of know by now, but then again this is why you do it: you always check the battery plug. You always check that ribbon cable.
A reset of the controller is a good bet. This rules out software glitches. When you put it back together, hardware problems is not uncommon. Something shifted around in there.
When you shut the case, something can get knocked loose. A connector could come undone under pressure.
And there you have it, a functioning controller. No more warranty claim. No more call with support. Fixing it yourself. And it feels good when that happens.
When you know what the issue was. When you can fix it. The controller works like new. It’s back up and running. You plugged it in. The light turned on. It charged quick. It retained the charge well.
