
By default, most Panasonic Inverter AC remotes will shows temperatures in Celsius. If you want it to be measured in Fahrenheit instead, there’s an easy way to do so. No hidden menus required! Just find the right button on your control panel and you’re good to go. Everything’s neatly marked out on remote control itself.
There’s a button underneath the display screen for reducing temperature. Why would they switch measurement units with just one button?
How to Switch Temperature Units
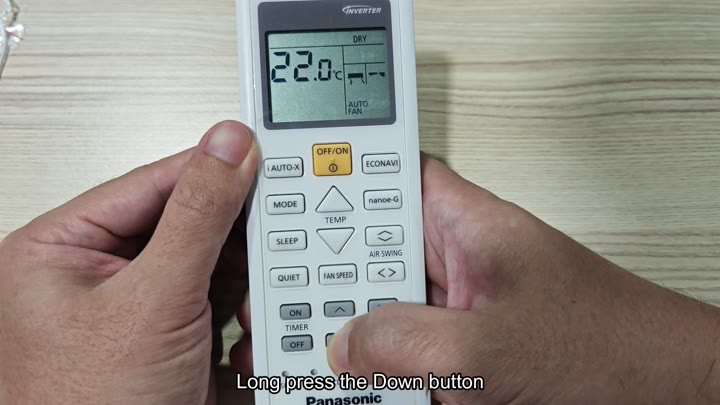
But note: On some remotes, the button may also activates other settings when held down. Worth a try though to see if that’s the case with yours.
Press and hold the down temperature button.
Don’t lightly tap this button; hold your finger down on it for a second or so. You might notice that the screen doesn’t update right away, which can throw you off at first. But then the screen will flicker, and numbers will swap over. There before your eyes, the temperature unit has switched from Celsius to Fahrenheit. It’s fast. No tricky steps is involved.
Now you’ll see it displayed in Fahrenheit on the screen. The AC mode (COOL or DRY) are the same. And the fan speed (usually on AUTO) hasn’t changed either. Everything else on the remote interface are still the same.
It’s just that the temperature unit has switched over to whatever you prefer. When it’s finished, let go of button. That’s all there is to it. There is nothing special about this remote and its simple interface.
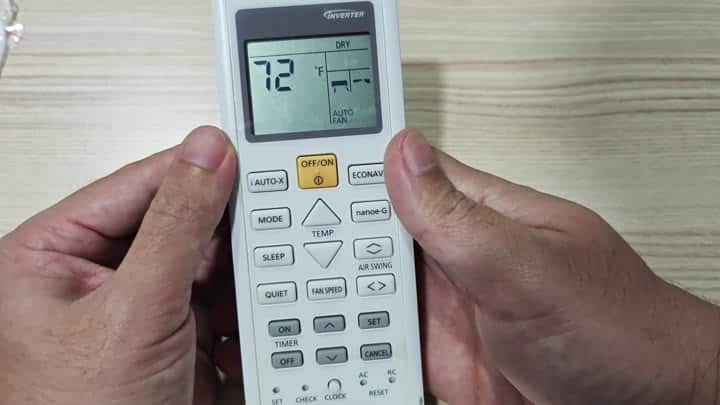
As you can see, the INVERTER label is still up top. The other buttons are all where they should be: Fan speed, MODE, ECONAVI, etc. No more clicking around multiple setting menus. No more having to remember what combination of keys to push. Just hold down one button to make change.
But some manufacturers bury it. They believe that no one would ever want to find the option anyway. And perhaps some moddern manufacturers think that unit choice isn’t important to anyone else.
That’s all well and good but for those of us who knows how to change the unit, it still comes in handy. Why? Because it helps save time when you’re changing settings for someone else or on the road. You don’t need to purchase a new remote or reset whole system.
To return to Celsius, it’s just as simple. Again press and hold down button. The display flips back to starting unit. It’s almost like a software toggle switch. There are no errors or delays in the conversion.
You can try it repeatedly to make sure it works every time. By default, the remote will remain on whatever unit you last used.
There are no complicated codes to remember with this feature either. There’s no need for manual. It’s all designed into the remote.
It actualy has you in mind as you hold it so that you know which button to press. The temp/adjust up/down button serve two purposes: adjusting your units and lowering your temperature. Most people just use it to turn down their heat. But if you hold the button it will unlock its secondary function. It is a small but useful tip to make your life easier.
For those of us that prefer Fahrenheit, this is a good solution. Having your remote display what you can read feels like personal touch. Instead of changing yourself to match the remote’s default display, you get to define it.
It’s an accessible feature, but it’s also very effective and straightforward. It really improves the experience interacting with the remote. You should of tried it sooner to see how easy it is. It feels more comfortabley than the Celsius setting.
