
If your PS4 controller buttons aren’t registering anymore, there are ways to clean off the inside and reset the controller. If the buttons aren’t working properly, it could be a simple physical problem. It could also be a glitch that’s affecting the rest of the controller.
Begin by trying to reset since it’s also one of the simplest options. There are several tutorials online for how to perform the reset. It’s just as simple as using a thin object like a paperclip to push in the little reset button located on the back of the controller. The button itself is very small and easy to overlook without knowing exactly where to find it. While doing this, the blue light bar will glow, letting you know it’s working.
While a reset can solve issues with some of the above, that didn’t apply here.
Inspecting the Internal Hardware
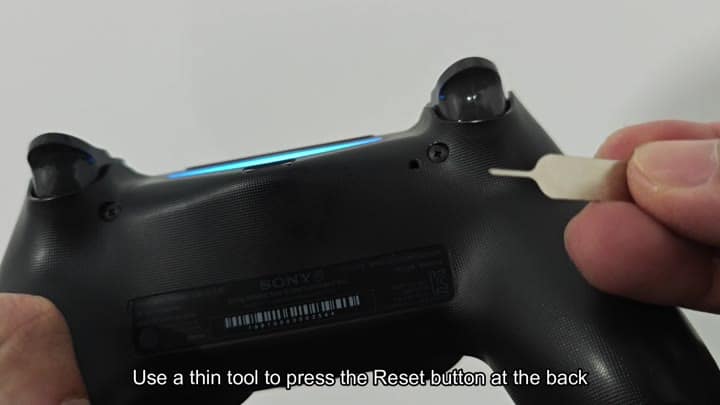
However, none of the buttons would respond. So it wasn’t software related. Time for some hardware inspection.
To get to the inside components you need to remove the housing, but do this carefully; there’s no need to force anything. With the housing removed, disconnect the ribbon cable connecting the light and touch pad to create more working space.
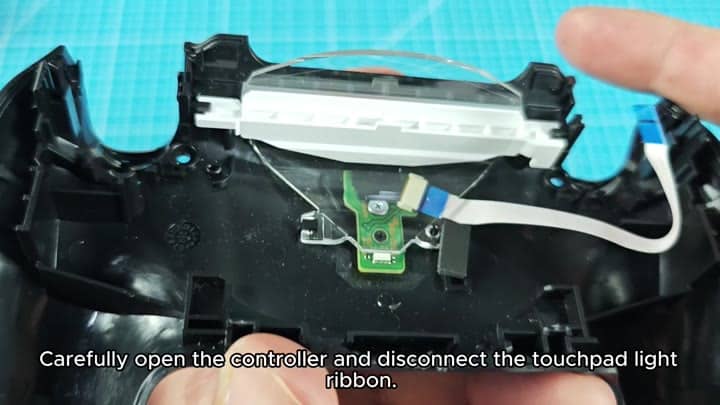
It’s actually pretty simple inside. There’s just a rubber membrane with some metal contacts underneath it on the circuit board, which the button caps press against. The first thing you’ll want to do is see if your analog sticks is still working as intended. If so, then the issue seem to be limited to the face buttons.
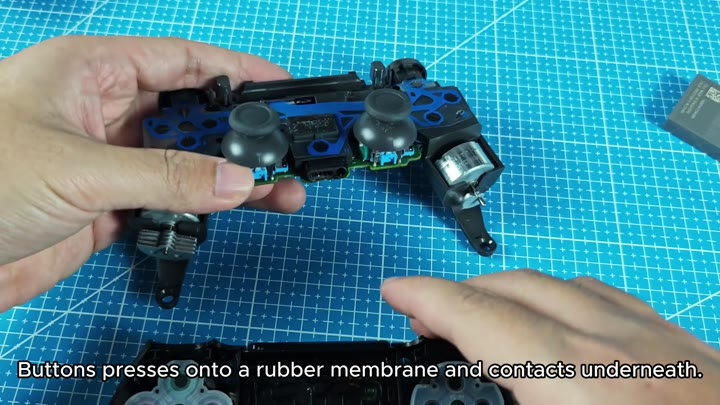
Finally, there is a rubber membrane that uses graphite pads to complete the circuit. When you push down on a button, those pads touch the traces on the PCB; and if they don’t make contact, the input isn’t registered. Take note of the rubber sheet; it has been known to come loose from its positioning over time and even tear.
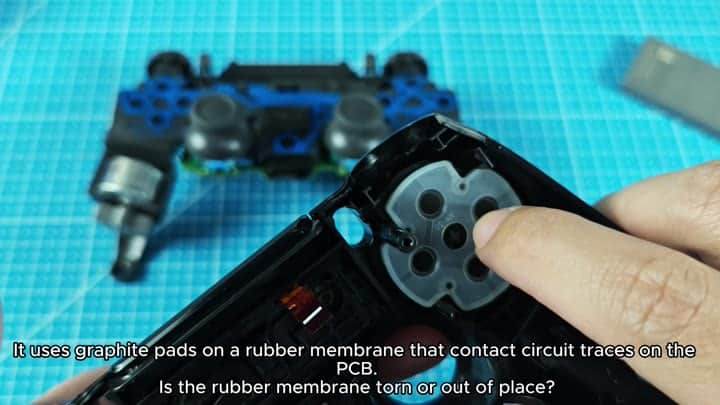
Dust and debris often build up inside the controller, and grime can accumulate on the contacts.
The graphite pads tend to become worn from repeated usage over a number of years. Also, all that dust and junk gets into the controller and accumulates on the contacts. Clean them off real good and make sure you have nothing on them. Examine the rubber membrane as well for rips or tears. Everything appeared fine here but was grimy.
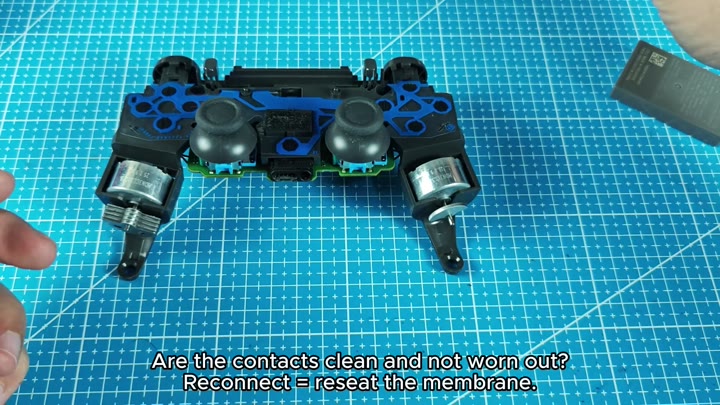
Now it’s time for assembly. Reconnect the touchpad light ribbon cable. Be careful when doing this.
The next step is to put the rubber membrane back in its rightful place but this time make sure it’s seated firmly. The rubber membrane should be flat and aligned.
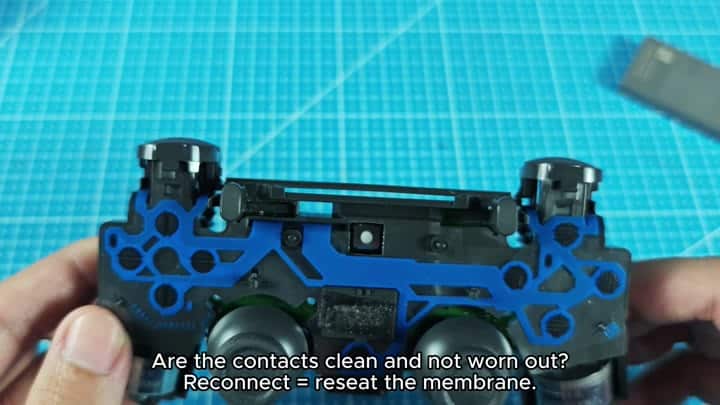
The buttons don’t work
If the membrane is crooked, the buttons won’t register correctly. You reassemble your controller and try it again. Buttons are working straight away.
So it wasn’t some kind of software glitch, it was actualy something wrong with the hardware. You didn’t have to purchase a new controller; cleaning the contacts took care of it. It was an easy fix and saved money.
This is why many people chuck their controllers away, thinking it’s a broken board. More often than not, it’s a loose membrane or just dirt. If you look inside, you’ll see what I mean. It doesn’t require any special tools, only patience.
The secret lies in the graphite pads that connect your finger to the chip. They serve as the conductor. Once they’re dirty, there’s no longer a signal. By cleaning them, the circuit re-opens and we return to a basic mechanical principal. Your controller will feel good as new afterward.
Don’t freak out if your controller’s not right. The first thing to try is to reset it. Failing that, go poking around in there yourself. See what state your contacts is in and your membrane. Clean them if necessary. Put everything back in place to match. Maybe that’ll solve it. That’s where I’d begin if you’re having similar problems.
